Create A Photo From Text in Photoshop

This tutorial will show you how to create a photo made of words or random letters of the alphabet. It's a very simple effect to achieve on your image and don't be intimidated if you just started using Photoshop. We're just using basic tools here and I've tried to be as precise as possible in explaining each step. But if you still have any doubt, feel free to leave a comment. You can see the result shown in the preview images below. Basically, all three images are created using the same concept taught in this tutorial. You just have to get creative and play with different settings of the text, background color (black or white is an ideal color) or you can even add a texture as background.


1. Open your image in Photoshop. Duplicate your layer.

2. Go to Layer > New Fill Layer > Solid Color. Choose white or whatever color you want. This layer will be your background.

3. Copy your source text. It can be from a song, article, story or you can always type in your own words. Select the Type Tool (T). Click and drag your cursor diagonally on your image to form a dashed box. We are going to fill in the area inside this box with text. So, it's good to make the box slightly bigger than your canvas size just to make sure all area of your image is covered with text.

Paste your text on the canvas. You can see it has covered all your image area. If your image is big and your font size is small, you're gonna need lots and lots of words.

4. Looking at the current text, you can adjust the font type and font size to whatever looks good for you. I chose the font called Teen Light and set the size to 9 pt.


5. Now, re-arrange your layer palette so it's look like below. Your original image at the bottom, followed by the Color Fill Layer, then your duplicate image layer and on top is your Text Layer.


6. Place your cursor on the text layer, then press CTRL + left mouse click to select the text area.


7. You'll see on your canvas that the selection has been made on the text. Now, select the Rectangular Marquee Tool (M). Put your cursor on your image until you see a small dashed-box icon. Then, right click and choose 'Select Inverse'. What we're doing here is selecting the area outside of the Text.

8. Go to your layer palette and click once on the duplicate image layer to choose that layer. Next, hit the DELETE key on your keyboard. Click CTRL + D to turn off the selection. Now, we have eliminated the part of our image not covered in text.


9. To see our remaining image, put the text layer to invisible mode.


10. You can duplicate your image a few times to get darker effect. I duplicate it twice as you can see from my layer palette below. And my final outcome as shown in our first preview above.


*If you want effect like our second preview, start with an image with white background. Choose bigger font size (and perhaps a different font).

*If you want image like our third preview, in step 3 and 4, instead of covering your whole canvas with text, just type the words or sentence you want to be seen on the canvas. Of course choose much much bigger font size.
READ MORE...

Halftone Wave Photo Effect

I am actually pretty excited to show you this effect. I'm calling it the Halftone Wave Photo Effect. I think it is really cool and will work very well on a poster or flyer. I imagine in my head, it would be like a rock concert flyer, some cool party invitation..or something like that. But this effect can be used beyond my imagination. You are all smart people and I'm sure you can figure out the right place and time to use this cool halftone effect. This tutorial is meant to introduce you to the Bitmap mode in Photoshop. You can use this knowledge to create some other beautiful effect. Keep experimenting.


Halftone Wave Photo Effect


1. Open your image in Photoshop. Duplicate your image. We're gonna work with the duplicate image and leave the original image untouched. Perhaps, we can set the original image layer to invisible.


2. Next, we're going to remove the background of the image and replace it with a clean white background. If you already have a white background or just decide to apply this effect to your whole image, you can skip step 2a-2f.

There are several ways to remove the background. But today, I'm going to use the Extract Filter. Now, you can learn more detail about this method in my other post on How to Remove Background with The Extract Filter. Or you can save that for later reading and just follow step 2a-2f below.

2a. Go to Filter > Extract. The Extract Window will open. Choose the Highlighter Tool on the top left. Set the brush size to around 20 and select Smart Highlighting.


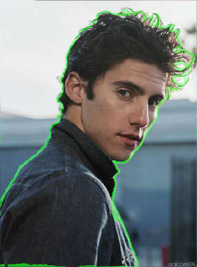
2b. Trace around the edge of your subject and close the path. Don't worry too much about precision when you're tracing the hair area (or any other area for that matter). Trust me, in this photo effect, the messier, the better.


2c. Now select the Fill Tool. Click on the subject (inside the traced area) to fill the area with sort of purple color. This purple area will be retained while the background will be deleted. Press the OK button.


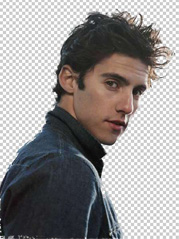
2d. Below is your result. We have successfully removed the background from the image.


2e. Open a new file in Photoshop. Perhaps the canvas size should be slightly bigger than your image in 2d. Set the Background to White.


2f. Drag the image you have extracted in step 2d onto the new canvas. Below will be your image (with white background) and your layer palette.


3. With your image layer selected on the layer palette, go to Image > Adjustment > Desaturate.


4. Then, go to Image > Adjustment > Levels. Drag the black slider to the right, and the white slider to the left until you got something like below image.


5. Then, go to Image > Mode > Grayscale. If asked whether to Flatten your image, just click Flatten.


6. Now, go to Image > Mode > Bitmap. Use the default setting as your resolution and set the method to halftone Screen. Click OK.


7. The Halftone window will open. The frequency setting actually depends on your image size and what kind of final effect you want on your image. You can experiment with several frequency and shape settings until you get the look you want for your image. My image size is 4x5 inches and I set the frequency to 53 lines/inch. Set the angle to 0 and Shape to Line.


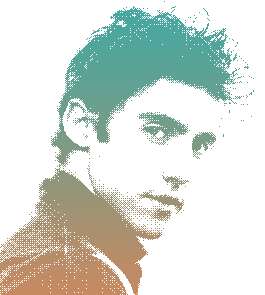
8. Below is the halftone effect I got.


Now, we going to add some colors to our image. Convert the image mode to grayscale. Go to Image > Mode > Grayscale. And to work with color, convert it to RGB mode. Go to Image > Mode > RGB Color. They are many ways you can add color to your image. First is using Gradient Fill Layer as shown in step 9.

9. Next, go to Layer > New Fill Layer > Gradient. I select one of the gradients I have installed in my computer and click OK. For more gradient option you can download some from our Gradient Collection. After you're done selecting the gradient, set the blending mode of the gradient fill to Screen.


And below is your final image.


10. Another way to decorate your image is to add some colorful textures on top of your image layer and set the blending mode to Darken or Multiply like what I've done on my initial preview result. Adjust the opacity if necessary. Try some of our Colorful Abstract Texture Collection.
READ MORE...

Create Pencil Sketch Photo Effect

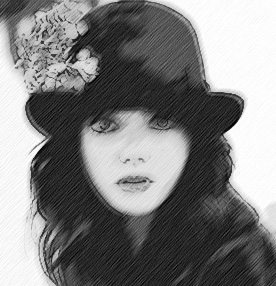
It's an undeniable fact that everybody can sketch. Whether it's a nice sketch or not..now that's a whole other story. That is why we have technology or more specifically, an image editing program called Photoshop. And our tutorial today will show you how to turn a digital photo into a nice pencil sketch image. You'll learn how to create a black and white pencil sketch. Also, you'll have the option to turn it into a colored sketch in the end. If you look at the preview picture, with some nice paper textures put into the mix, it can work as a comic book sketch as well. Hope you like this effect.


Pencil Sketch Effect in Photoshop


1. Open your image in Photoshop. Duplicate the image once. Desaturate the duplicate image. Image > Adjustment > Desaturate.

2. Duplicate the desaturate image twice. Below is your layer palette now. We have the original image at the bottom, followed by Background copy, then Background Copy 2 and at the top is Background Copy 3.


3. On the layer palette, click the top image (Background Copy 3) to continue working with this image layer.


-3a. Go to Filter > Other > High Pass. Adjust the radius until you got something like below. Most probably your setting will be in the range of 1 to 2 pixels.


-3b. Then, go to Image > Adjust > Level. Bring the left and right slider to the middle of the graph and close together until you got something like below.


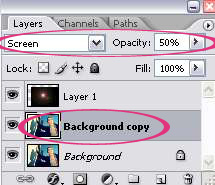
-3c. Set this Layer to Overlay with Opacity at 50%. You can revisit this opacity setting later to adjust it depending on what looks good on your final image.


4. Now, select Background Copy 2 to work with this image layer. Follow the steps below:


-4a. Go to Filter > Artistic > Cutout. Adjust the settings until you got something like below image. My setting as you can see is 6, 3, 2.


-4b. Next, go o Filter > Noise > Add Noise. Set the amount to around 6%, Distribution to Uniform and select the Monochromatic option.


-4c. Then, go to Filter > Blur > Motion Blur. Set the angle to 45 degrees and Distance to 12 pixels.


-4d. Naturally, after applying above effect, our image will look a little bit blur now. We're gonna sharpen it. Go to Filter > Sharpen > Sharpen. You can repeat this step again to get a sharper sketch.


-4e. Set the opacity of this layer between 50% - 80%.


5. Now, click on the Background Copy layer on your layer palette. What we're going to do now is adjust the brightness of our image. To do this, we'll add an adjustment layer on top of this Background Copy layer. Go to Layer > New Adjustment Layer > Brightness and Contrast. Increase the Brightness by 30 or more. I increase mine to 50.


Now, you'll get a nice black and white sketch effect on your image.


6. To get a colored sketch, just put the Background Copy layer to invisible mode as shown below. By doing this you get to see some color from the original image at the bottom.


Remember the opacity settings in step 3c and 4e? Now that you're done with all the crucial steps, you can either increase or decrease the opacity of layer Background Copy 3 and Background Copy 2 to get a nicer effect on your image.

7. Finally, we are going to add a paper texture to amplify the sketch effect. Click CTRL + SHIFT + E to flatten your image.

8. Download some nice paper textures from the web or you can choose one from our Paper Texture Collection. Open the paper texture in Photoshop. Drag your sketch image onto the paper texture. Use the eraser tool to erase the unwanted background of your sketch image. Below are my layer settings to blend in the sketch image with the paper texture(s) as background. Of course you can experiment with other blending modes and opacity for each layer.

READ MORE...

Creating Lens Flare in Photoshop

Perhaps a good photography practice is to try your best to avoid getting a lens flare on your captured image. But sometimes, for a twisted artistic reason we want to get that lens flare on our image. Now, if you're really good with your camera, maybe you can play around with the settings and figure out the perfect angle to get that lens flare effect. However, if you're still struggling with that {like me sometimes}, you can just turn to Photoshop to help you get the lens flare on your image. You can even choose where you want it to be.


1. Like many other tutorials, it always starts with opening your image in Photoshop.

2. You can do a little editing on the image coloring. If you like the coloring effect applied to the sample image above, you can download the psd file HERE, @ Best Photoshop Tutorials. After you're done with the coloring, flatten your image {CTRL + Shift + E}.

3. Then, create a new layer. Click on the New Layer icon at the bottom of your layer palette to create a new layer.


4. Fill the new layer with black. Go to Edit > Fill. A small window will appear. Select Black as the color you want to use.


5. Next, go to Filter > Render > Lens Flare. Select the type of lens you want to use. You can see the preview image of each lens when you make a selection. Once you satisfied with your selection, click OK.


6. Here's your canvas now.


Our next goal of course is to get the image of Rob Pattinson to appear again. It's not gonna be a hard task. All you have to do is set the blending mode of the black layer to Lighten {or you can choose to set it to Screen}.


7. Ah, the vampire is back. Now you can move the lens flare to the location you want. Select the Move Tool {V} and drag the flare layer anywhere around your canvas. I'm gonna move the flare slightly to the right.


8. As final touch, I'm gonna duplicate the image of Rob Pattinson and set it to Screen with 50% opacity.


Then, I'm gonna add a color fill layer {color code: 280010} and set it to Exclusion. Layer > New Fill Layer > Solid Color. Type in the color code above in the box specified for # and click OK.


Our final image:


READ MORE...