1. Open your image. Duplicate it just in case. We'll work with this duplicate layer.
2. Create a new blank layer. Layer > New > Layer or clicking the new layer icon at the bottom of the layer palette. Then, go to Filter > Render > Clouds. Set this cloud layer to Lighten with opacity around 80%.
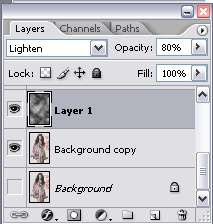
3. Now we want to make the image black and white. Go to Layer > New Adjustment Layer > Hue/Saturation. Drag the saturation slider to the left until you reach -100%.

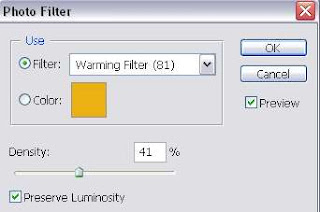
4. Next, go to Layer > New Adjustment Layer > Photo Filter. A small window will open. Apply the settings below and set the opacity of this layer to 75%.

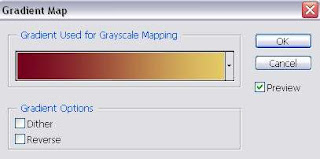
5. Then, go to Layer > New Adjustment Layer > Gradient Map. Select the gradient like the one below and click OK. Set this layer to Soft Light.
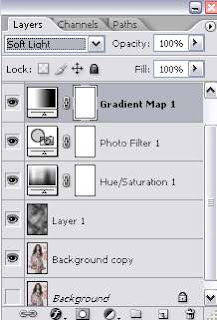
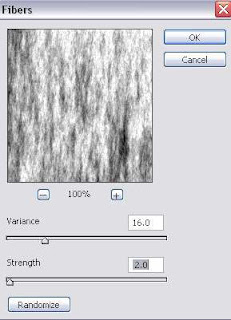
6. Copy the original image. Bring it to the top in the layer palette. Desaturate this image. Go to Image > Adjustment > Desaturate. Then, go to Filter > Render > Fibers. Use the settings below. Set this Fiber layer to Soft Light and decrease the opacity to 27%. And you're done. We've got the brand old photo effect.


4 comments:
Hey. This is a nice tutorial. But I really dont get what to do in Step 6. Can you please be specific with "copying the image". I mean, how. Thank you.
Copy your original image layer (in this case the Background layer). And drag the new copied layer to the top.
I have photoshop Elements 7, I do not have the same options under Image, NO adjustment option, or de-saturate that I can find. Is it in some other place? I was a little confused about step 6 also. I duplicated the layer, Right? But my image doesn't end up looking like anything near yours. Kathie
Hi Katie,
I believe PS Elements is a little bit different than Photoshop CS. You may have limited function with the Elements..ie no Adjustment Layer.
To desaturate in PS Elements, you can try the following:
Enhance>Color>Hue and Saturation. Slide the Saturation slider all the way to the left.
Or go to Image>Mode>Grayscale
Or Choose Enhance>Convert to Black and White
Post a Comment