Here's a few examples of this effect:
You can see more stunning examples in our Fake Miniature Inspirational Gallery.
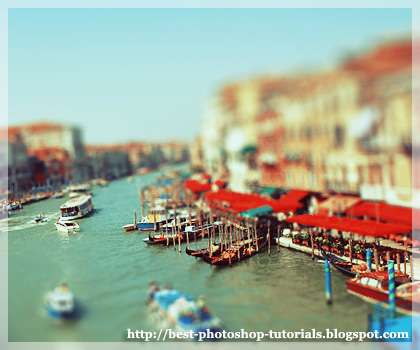
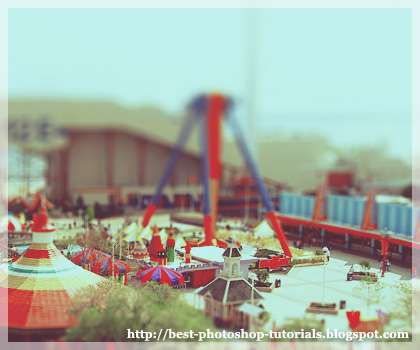
It's important that you choose the right photo for this miniature effect. Since we often see a miniature model from an elevated angle, photos that are taken from above with a wide viewing angle tend to be more suitable for this tilt shift effect.
1. Open your image in Photoshop. Set the color to the default black and white by pressing D. Make sure the foreground color is black.

2. Choose the Gradient Tool (G). At the top setting, make sure you select Reflected Gradient, the 4th icon.


3. Then, select Edit in Quick Mask Mode (Q).

4. Drag a vertical line on your image. Start from where you want the focus center to be and drag upwards to where you want the image to be out of focus.
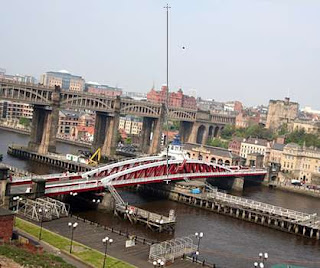
You'll see a red mask after you release your mouse. The red color is darker at the center of the focus and fades as you go out of focus. If you're not satisfied with the focus area, just go to Edit > Step Backward, drag the line again until you get the focus you want.
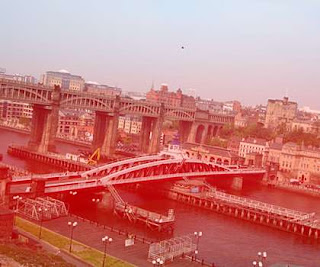
5. Next, switch back to Edit in Standard Mode (Q). You'll see dashed lines surrounding your image.

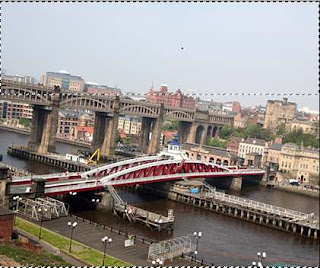
6. Now, go to Filter > Blur > Lens Blur. Adjust the Iris and Specular Highlights settings on the right hand side until you see something you like. Here's my settings:
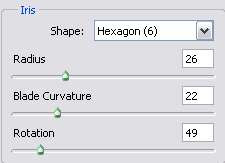

And this is what I got with my applied settings:
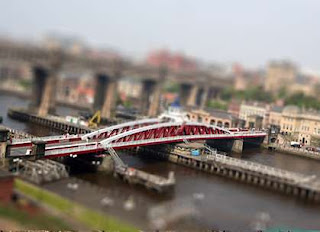
7. Press CTRL+D on your keyboard to remove the dashed lines on your image.
This fake miniatute effect requires a fair amount of trial and error. You may not get something you like the first time. Step backward several times and repeat step 4, 5, 6 and 7 until you get something nice. Try a different focus area or adjust your Lens Blur settings to get something different.
The next few steps will enhance the coloring of your image, so it'll look more like miniature model.
8. Go to Layer > New Adjustment Layer > Hue/Saturation. Increase the Master saturation to around 35-45%.
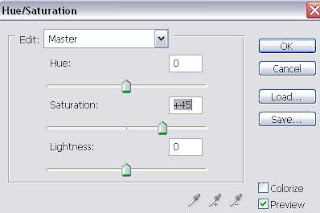
9. Next, go to Layer > New Adjustment Layer > Level. Slide the black slider a little bit to the right to change the input levels until you get a better contrast on your picture. You can also slide the white slider to the left if you need to.
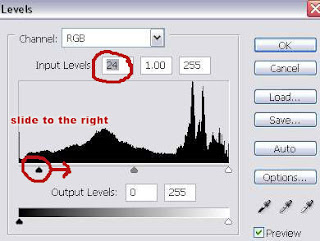
And here's our final image:
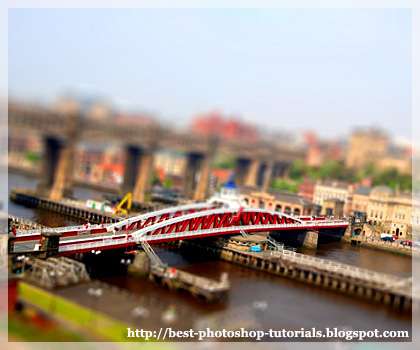
Or, if you want the coloring like the image below, try one of our coloring enhancement actions instead of adding the hue/saturation and level layers.

Credit for the photos:
Venice taken by sundstrom
Bridges Over The River Tyne taken by Kklass01
Cedar Point - my personal collection.


8 comments:
Good Tutorial! It was chosen for the home page of http://www.tutorialsroom.com
Please submit all of your future quality tutorials in there.
Good Tutorial! It was chosen for the home page of http://www.tutorialsroom.com
Please submit all of your future quality tutorials in there.
Very nice! easy and simple., yet idealistic.. :)
Good one.. :)
Lovely tutorial. Your page Definitely a bookmark for me.
Great tutorial!
But the link to action #27 doesn't work, can you please send a new link or shortly explain it?
Thank you :)
Hi there,
This is the new link to the coloring action: http://www.box.net/shared/pmkk97v3mi
thanks for the tutorial, very useful for me because I'm a newbie
OMG! This is fan-freakin-tastic! Thank you, thank you, thank you for sharing this technique. I can already tell, I'm going to be addicted.
Post a Comment