Today's tale is about the adjustment layer in Photoshop CS and why you should be using it instead of the regular image adjustment from the menu. If you've read some of our tutorials, you'll notice that we often use Adjustment Layers. And in case you're wondering, what's the different between this method and the regular image adjustment method, then today must be your lucky day, because you're about to find out what it's all about. So, continue reading. This ought to be good for you and your future.
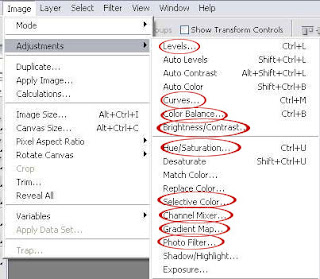
First, let's see what the regular image adjustment does. You can find the image adjustment under Image > Adjustments. You'll see several options as shown below.
So, we have the photo below. As you can see, it's a little bit red on the skin. I'm gonna use Color Balance to correct the image and achieve the 'After' image.
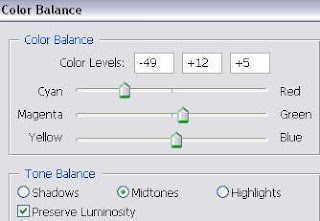
Go to Image > Adjustments > Color Balance. The Color Balance window will appear. And I adjust the settings as shown below..and click OK.
After looking at the final image for a few seconds, I don't think it's the outcome I want. So, again..I go to Image > Adjustments > Color Balance. And a Color Balance window will appear. But the values are all set to zero.
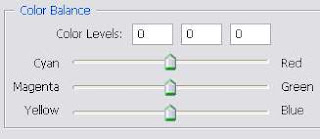
What this essentially saying is that, part of the original image information is lost when I made the initial edit with the Color Balance adjustment. When I want to make another Color Balance adjustment, I have to start with the adjusted image, not the original one.
Once you've made the adjustment it will be permanent. Unless, you build a time machine, there's no way you can get the information of the original image back. Okay, maybe the 'step backward' function will help a little bit but it can only trace back until a certain amount of steps. When you close the file, there's no turning back.
And now, let's see why Adjustment Layers are so much cooler than the regular adjustment method. BTW, you can find the adjustment layer option under..Layer > New Adjustment Layer.
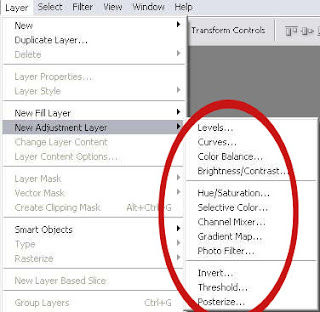
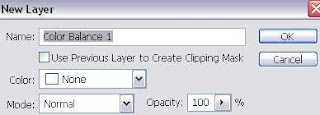
With the original image selected on the Layer Palette, go to Layer > New Adjustment Layer > Color Balance. You'll see a small window below..just click OK.
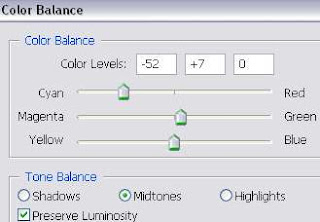
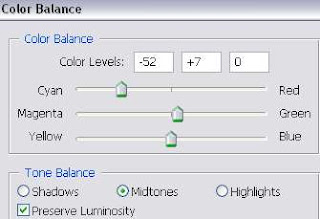
And you'll see the Color Balance window. Adjust the settings until you got something you like for the image. I chose the settings below.
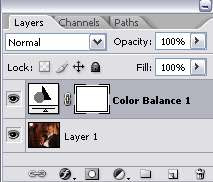
In the Layer Palette, you can see a new layer called Color Balance 1 is created.
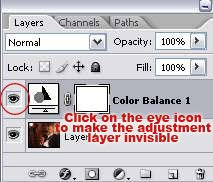
To see your original image, just click on the eye icon on the layer palette to make the Adjustment layer invisible. Click on it again to make it visible. Or if you don't like it, you can just delete the adjustment layer and you're left with the original image.
If after a few seconds, you change your mind and decided to change the color of your image a little bit. Just double-click on the icon circled in red to bring out the Color Balance window again.
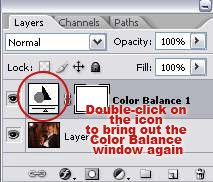
Notice that, you still have the values of your setting just now. And from that, you can start adjusting the Color. It's like you're adjusting from the original image. And since you're making changes to the settings for the adjustment layer, not to the image itself, you're still not harming a single pixel in the original photo. In fact, you can go back and make as many changes as you want to an adjustment layer and never have to worry about damaging your original image..
As long as you're using adjustment layer for your editing, you can keep changing your mind over and over again even after you close the PSD file. You can reopen the PSD file a year from now and still make changes to your image. And remember, this method does not just apply to Color Balance adjustment, you can use it when adjusting the Curves, Levels, Hue and Saturation etc..
Therefore, if you decided to edit your image anytime soon, use adjustment layers..and you'll realized how much flexibility you can get when doing the adjustment.
READ MORE...


