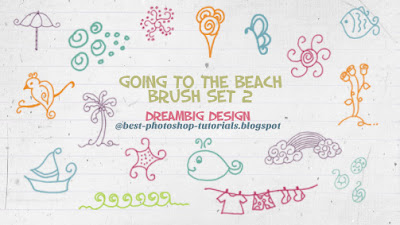
Turn your doodle into Photoshop Brush
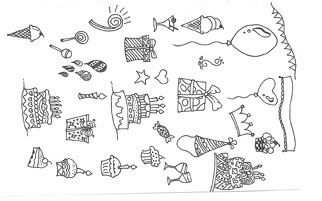
1. Obviously, you have to scribble something on a piece of paper. If you're more of a spontaneous type, you can straight away use a gel pen (preferably black) to make your doodle. Otherwise, you can use pencil first, then trace it carefully with a gel pen.
2. Scan your doodle. Save it in a format that can be opened in Photoshop ie. pdf or jpeg. Set the resolution to 300 dpi.
3. Open your scanned doodle in Photoshop. File > Open > select the file to open.
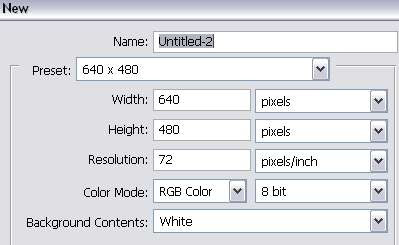
4. Create a new file. File > New. For now, I'm gonna choose the document size as below. If you're planning to create a bigger brush, choose a bigger document size.
5. On your Toolbar, select the Rectangular Marquee Tool (M).

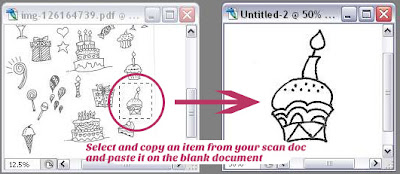
6. On your scanned doodle, use the Marquee Tool to select an item. I'm gonna start with the cute little cupcake. Copy the selection (CTRL+C) and paste it (CTRL+V) on your new document that you've created in step 4.
7. Eliminate the unwanted area using the Eraser Tool. Or you can always select that area using Marquee Tool and hit the DELETE key on your keyboard.
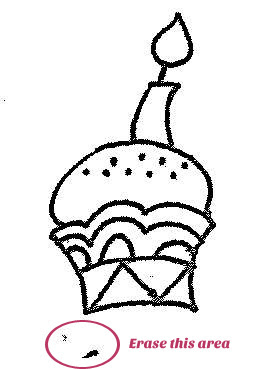
8. Sure some of you can go ahead and save what you have now as a new brush.
But I'm gonna show you some additional tips on how to create a very smooth and high contrast doodle brush.
9. Go to Edit > Transform > Scale (or shortcut CTRL+T). Resize your image to 70% or 80%.
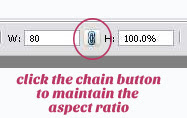
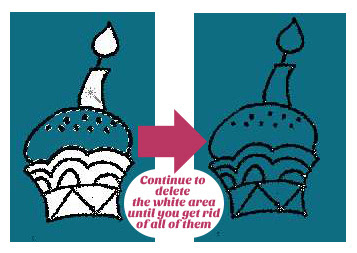
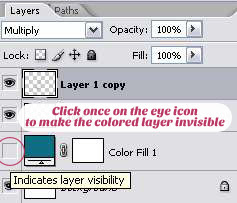
10. Next, you need to delete the white background. To easily identify the white area that needs to be deleted, I've created a color fill layer and place it underneath my image layer.
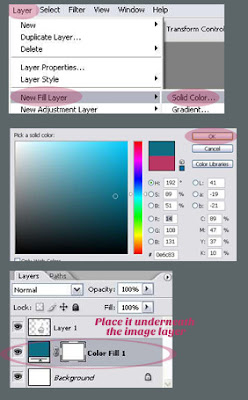
With your image layer selected, choose the Magic Wand Tool (W).
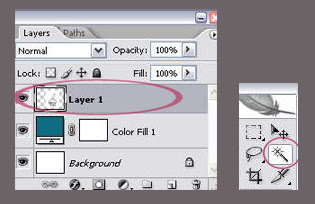
Click on the white area with the Magic Wand to select the area. Then, hit the DELETE key on your keyboard. Repeat this step until all white areas are eliminated.
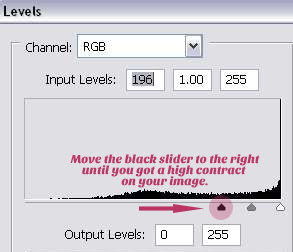
11. Go to Image > Adjustment > Levels. Move the black slider to the right until you get a high contrast image.
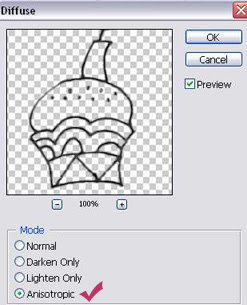
12. Go to Filter > Stylize > Diffuse. Choose Anisotropic. This will smooth out the line of your sketch.
13. Duplicate your image layer. And set the duplicate layer to Multiply. This will add further contrast to your sketch.
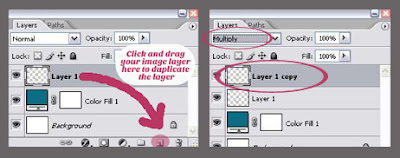
14. Click on the eye icon beside the Color Fill Layer to make that layer invisible. Now you're left with the white background again.
15. It's time to save your doodle as brush. Go to Edit > Define Brush Preset. Give your new brush a cool name and hit OK. Now you can use this newly created brush when you select the brush tool.
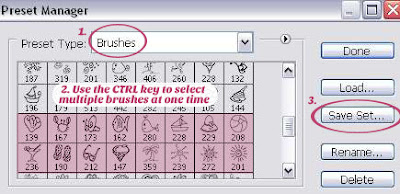
16. Go ahead and create some other brushes from your doodles. Finally, let me show you how to save several brushes into one set. For instance, you have 10 different cupcakes brushes and you would like to save them in one .abr file. So that, when you post this file on the web, people can just download this one file and get all the 10 brushes in one set.
Go to Edit > Preset Manager. Choose Brush as preset type. CTRL + click on the brushes you want to include in the set. Then, hit the "Save Set" button. Save it to your brush folder.


9 comments:
Very interesting. I was not familiar with the stylize>diffuse option.
The way I've been doing it is to get the image to have a completely white background by desaturating it and then adjusting the brightness/contrast or curves. I then define the brush preset from there.
After I define the brush preset, I stamp it on a new layer and then give it an outside stroke of a bright color, say red. If the image has any fuzzies around it, I load the selection and check the "invert" box. If the outer fuzzies are light enough, this gives one the ability to delete it without altering the image.
I then save the image as a transparent PNG and open it up in illustrator and do a live trace to remove any jaggies.
Your method will be quite useful for items that have high detail and won't work in illustrator. Thanks so much for sharing! Maybe something that I've mentioned above may be useful to you as well.
I've subscribed to your blog and look forward to reading more of your posts.
I've always been interesting in the brush making process in Photoshop though it was originally for creating custom watermarks that didn't ruin my art pieces. Learning to take my whimsical doodles and turning them into brushes seems like such a fun and useful thing to try out.
Thank you so much for writing this tutorial!
@ Su
Thank you for sharing your method. I'm sure I'll find it useful one of these days ;)
Thank you very much , I'm like it and very good idea
Thank you
Thank you
very nice tutorials. Thank you for sharing your method.
Free Photoshop tutorials
Thanks a lot.
Your method is easier then we use to do at Product Photography Support And Professional Image Editing Services at Xcido graphics
thanks for this share! now i can create my own brush. thanks again! :)
Post a Comment