Note: This tutorial is written specifically for the action files available with my icon coloring tutorials. If you wanna know more about Photoshop Actions in general, you should read: How to Create and Use Photoshop Actions
1. Download the action file and save it to your hard disk.
2. Open your Photoshop program. Note that all my actions files are done in Photoshop CS2. So, I'm not entirely sure if they will work with other version of Photoshop. You can try though and give me some feedbacks later.
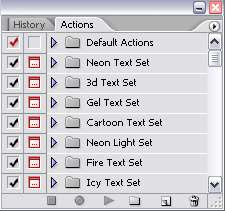
3. Look for this pallete in your Photoshop. If you can't see it, go to Window > Actions to make it visible.
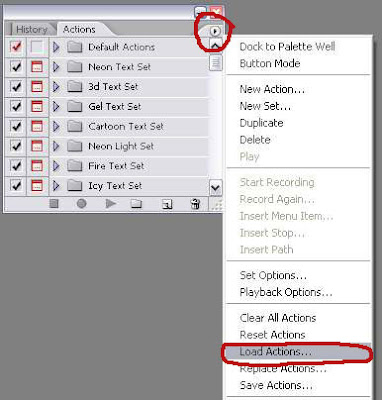
4. To open the action file you just saved, click on the small triangle button at the top right of the actions palette and choose Load Actions.
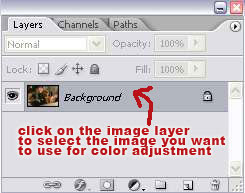
5. Now, open your image. On the layer palette, select the image layer you want to use. In my case, this layer is called 'Background'. Yours can be called anything..and not necessarily the background layer.
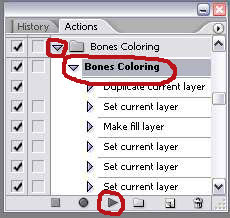
6. Now back to the action palette, click the small triangle beside the set you load just now to see the action included in the set. Select the action you want to use. Hit the 'Play Selection' button at the bottom of the actions palette.
7. After a few seconds, you'll automatically have a beautiful colorized image. If it looks good to you, no need for the editing part. If not, you can try one of these tips:
A. If your image is dark, you can add more screen layers. Duplicate the image, click on the image and drag it to the 'create new layer' icon at the bottom of the layer palette. Set the layer properties at the top left and adjust the opacity of that layer if you want. Repeat the steps above if you still need more screen layers.
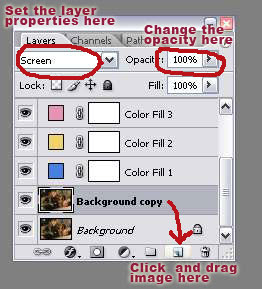
B.To get darker coloring, you can duplicate your image and set it to soft light. Again adjust the opacity if you need to.
C. Sometimes it's necessary to use both screen and soft light layers to achieve the coloring you want. Adjust the opacity of those layers until you get something you like. Example shown below.
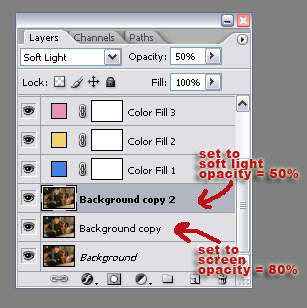
Remember to flatten all the layers (CTRL+SHIFT+E) before you do the cropping.
And what you do next with the image is up to you. You can crop it and make a 100x100 icon or a banner maybe.


3 comments:
Thx - this is awesome! And the action works fine for PS 7.0... would love to have more of these!
This works on Photoshop CS. I think with Photoshop 7.0 all versions became compatible, in terms of brushes, actions, and things of that nature. I could be wrong though.
Gracias!!!
Post a Comment