Preview Images for Watercolor Effect in Photoshop
Tip: This vector effect would be better if you start with a high resolution image and then scaled down to your desired size after you're done with step 8 of this tutorial. See result below:
1. First, open your image. It doesn't hurt if you have a nice coloring for the image. So, for my image, I use this coloring tutorial to enhance the color of my image. Remember to flatten your image (CTRL+SHIFT+E) after you get your desired coloring.
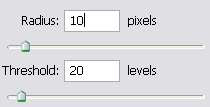
2. Now, duplicate your image. Leave the original image untouched in case we make any mistake later. Let's call the duplicate image, Image 1. We're going to apply surface blur to this image. Go to Filter > Blur > Surface Blur. The reason we use this filter is to get the smooth texture on the surface but still retain the sharpness of the edges. Adjust the settings until you see something similar to the image below:
Here's my setting..but yours can be different depending on the image itself.
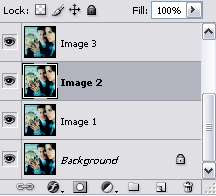
3. Next, duplicate the Image 1 layer twice. I'm gonna name these two new layers as Image 2 and Image 3. Look at the picture of the layer palette below for better clarification.
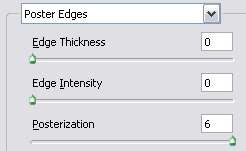
4. Select Image 2 in the layer palette. Then, go to Filter > Artistic > Poster Edges. We want the surface to still be smooth but get a little bit of a posterized effect on the image. Play with the settings until you get something like this:
This is my settings:
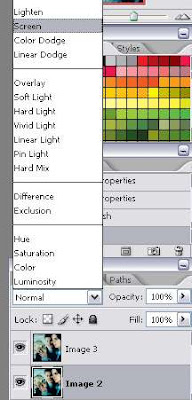
5. Set the blending mode of Image 2 layer to screen.
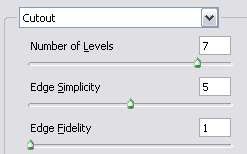
6. Now, select Image 3 in the layer palette. Then, go to Filter > Artistic > Cutout. Adjust the settings on the right until you get something similar to this:
Here's the setting I use on my image:
7. Set the blending mode of Image 3 layer to Multiply. Adjust the opacity of this layer until the cutout lines are not very apparent on the image. Mine is set to 29%
8. If your image looks good, you can probably leave this step out. Have the Image 2 layer selected in the layer palette, now..remember the blending mode of this layer is set to screen in step 5. We're just gonna play around with the blending modes and the opacity here until we get the effect we want on our image. These are a few examples of the result I achieve and their settings:
a. Image 2 layer set to screen with 76% opacity.
b. Image 2 layer set to overlay with 100% opacity.
c. Image 2 layer set to vivid light with 55% opacity.
d. Image 2 layer set to vivid light with 100% opacity.
How's that for a simple watercolor effect?...


2 comments:
A really nice effect, Thank you!
Nicholas
Thanks for the tutorial...pretty good effect
I made my own version naturally...
http://photoshop-pinups.blogspot.com/2008/11/vector-art-tutorial-nansy.html
check it out
Post a Comment