1. Open your image. Choose a picture that has a good balance between light and dark. Duplicate your picture twice. We'll leave the original image untouched.
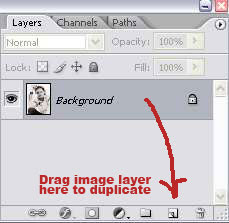
This is your layer palette now.
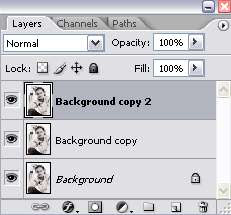
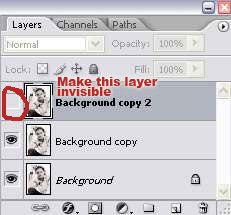
2. Click the eye icon to the left of Background copy 2 layer to make that layer invisible.
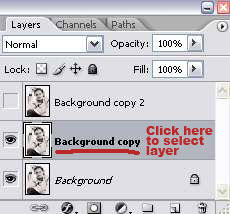
3. Select Background copy layer.
4. Then, go to Filter > Artistic > Cutout. Adjust the settings on the right until you get something like this:

Here's my settings. Yours can be different depending on your image.
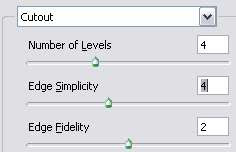
5. Select Background copy 2 layer.
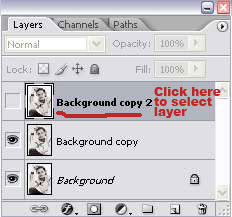
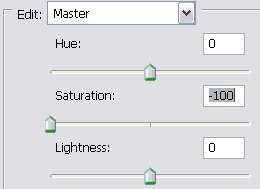
6. Now, we want to add a few adjustment layers. We'll start with the Hue/Saturation. Go to Layer > New Adjustment Layer > Hue/Saturation. Set the Master Saturation to -100.
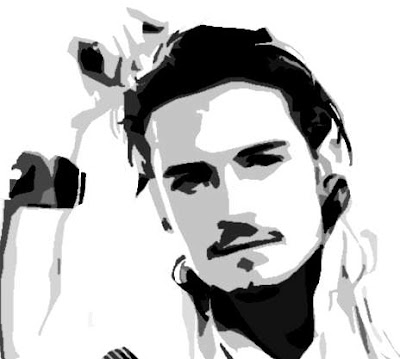
7. Next, go to Layer > New Adjustment Layer > Levels. Slide the 3 sliders shown below until you get a good balance of black, gray and white area on your image.
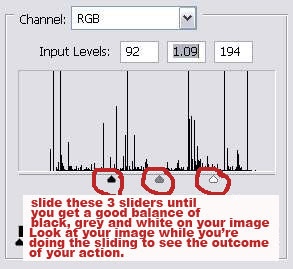
This is my image after I applied the Levels adjustment.
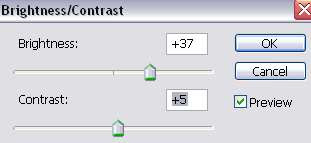
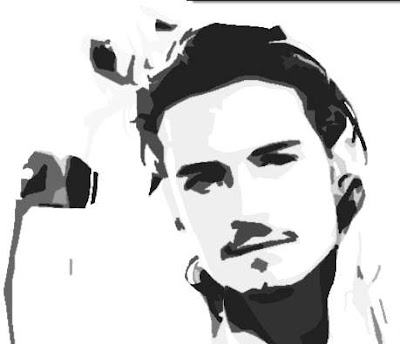
8. Then, go to Layer > New Adjustment Layer > Brightness and Contrast. Adjust the brightness and contrast settings to further enhance the stencil effect on your image. Here's the settings I chose and my outcome:
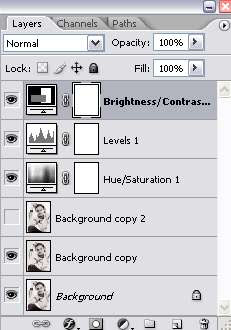
9. In case you're confused, here's what your layer palette should look like now.
10. Click the box beside the Background copy 2 layer to make it visible. Then, click on the layer to select it.
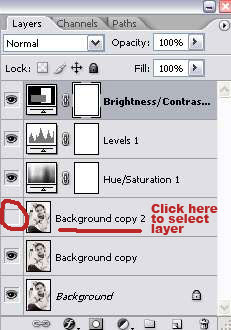
11. Now, we're gonna experiment with the layer property and the opacity setting to get the result we want.
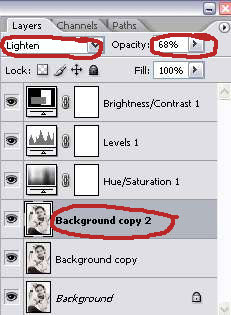
Here's some settings you can try and the result I got with my image:
a) Set Background copy 2 layer to Lighten with 68% opacity
b) Set Background copy 2 layer to Multiply with 50% opacity
You're always free to try other settings.
This tutorial is written to guide you on how to achieve this stencil effect on your image. Just play around with the settings to get the result you want. It's not necessary to follow all the settings and steps in this tutorial, just be innovative until you got something nice for your eyes.
And if you wanna amplify this effect with colors, mix with the cool modern vibe, try our Gradient Effect tutorial.


10 comments:
Thanks for this great tutorial! I used it on my photos and they turned out just the way I wanted them to be :)
No prob =) Glad you got the effect you want..
Great tutorial. Thanks for sharing your talent.
Nice tutorial, however mine didnt turn out nearly as crisp as yours. Good job.
Cool tute!
Thanks,
Lautus Design
this is interesting.
thank you for sharing
thanks so much,i've tried doing other tutorials like this but none have worked until this one!
Good job!
thankyou so much. this is amazing!
Thank you for this tutorial. Exactly what I was looking for. Well done!b
Super tute. Even a 57 yo untrained mum can use it. Many thanks.
Post a Comment