1. Open your image. If the coloring is not too attractive, might want to take a look at our image coloring tutorial section. FYI, I use this photo coloring tutorial. Adjust the photo color if you want. Don't forget to flatten the image (CTRL+SHIFT+E) after you did the coloring.
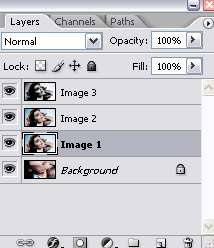
2. Duplicate your image three times. Here's what your layer palette should look like. I've renamed the layers to Image 1, Image 2 and Image 3..so it'll be easier to identify them in this tutorial.

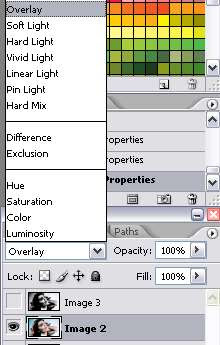
3. Now turn off the very top layer (Image 3) by clicking the eye icon beside it in the layer palette. Select the Image 2 layer in the layer palette. Set the blending mode to Overlay.

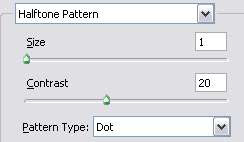
4. Turn the Image 3 layer back on. Go to Filter > Sketch > Halftone Pattern. Adjust the setting on the right until you get something like this:
Here's my setting:

5. Set the blending mode of Image 3 layer to Color Burn. Duplicate this layer and you get the result of this tutorial.
.. a lovely halftone retro photo effect with vibrant coloring.


6 comments:
Parabéns. O tutorial é simples e bonito, mas não muito explicado.
Somente pessoas com conhecimento sobre o Photoshop pode fazê-lo.
Abraços.
Fátima
Awe this is brilliant ! It gave my pic a new peppy look ! loved it ...amazing.Thanks for sharing with us.
Thank you..I'm glad you like it =)
nice post
Nice post! Thank you for this template http://www.itemplatez.com
Nice and simple instructions to follow. Thanks
Post a Comment