Blue Coloring Effect
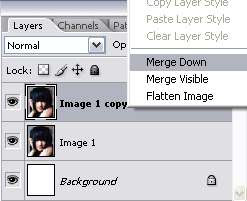
1. Open your image. If your image is kind of dark, duplicate the image and set the duplicate layer to screen, adjust the opacity if needed. Then, merge the two layers (CTRL+E) or right click on the duplicate layer and select Merge Down.
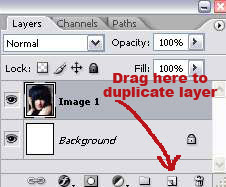
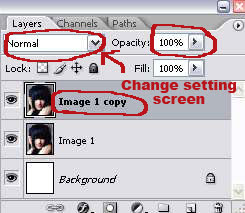
2. Duplicate your image layer again. Then, go to Image > Adjustment > Desaturate. Set the desaturate layer to Soft Light.
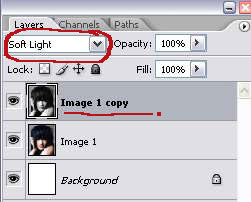
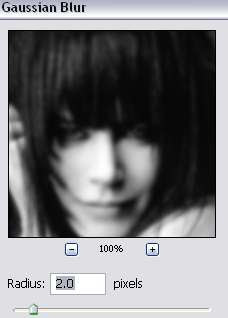
3. Now, with the desaturate layer selected, go to Filter > Blur > Gaussian Blur. Set the radius to 2 or any value between 1.5 to 2.
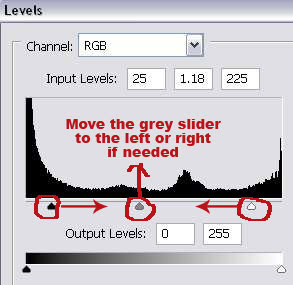
4. Next, go to Layer > New Adjustment Layer > Levels. Adjust the sliders until you got something like the image below. The key is to get more contrast on the color and make the image a little bit brighter.
Here's the setting I used for the input levels.
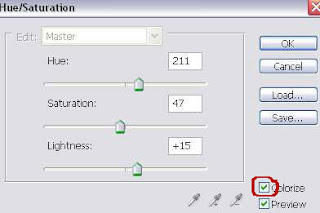
5. Then, go to Layer > New Adjustment Layer > Hue/Saturation. Check the Colorize option and use the setting shown in the image below.
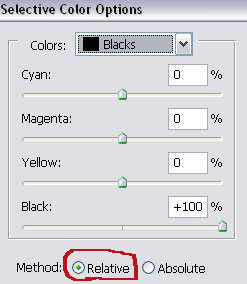
6. Now, go to Layer > New Adjustment Layer > Selective Color. Choose Black in the color dropdown menu and use the setting below:
7. Next, go to Layer > New Adjustment Layer > Curves. Choose the blue channel.
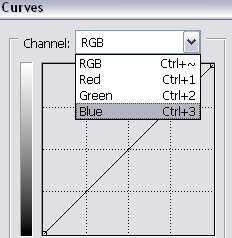
Click twice along the graph to make two points. Then, move the points until you get something similar to the curve below.
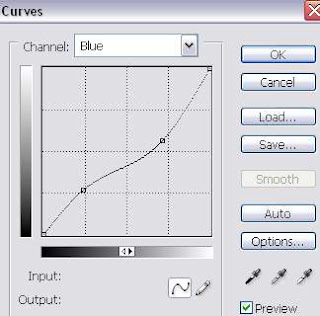
And here's your final image:


3 comments:
really usefull and pretty tut ! Thanks a lot
You're welcome =)
I love the tutorials. Would love to see more. Thanks!!
Post a Comment