1. First, open your image. For this tutorial, we'll have to start with a colored image.
2. Next, we're gonna convert this colored image into a black and white image. Follow our tutorial on Converting your Picture into a B&W Photography to complete this step.
3. After you're done with step 2, your layer palette should look like this:
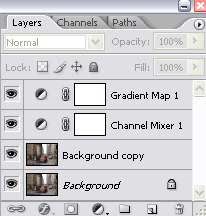
Click on the eye icon to the left to make the original image invisible.
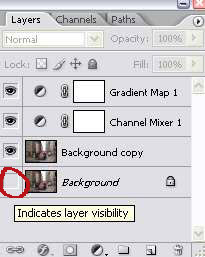
Then, click CTRL+SHIFT+E to merge all the visible layers. Here's your layer palette now:
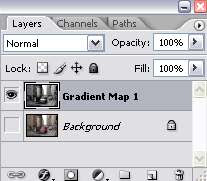
4. Set the original layer back to be visible by clicking the box where the eye icon is.
5. With the B&W layer selected on the layer palette, click the 'Add Vector Mask' icon at the bottom of the layer palette.
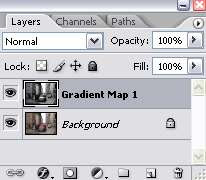
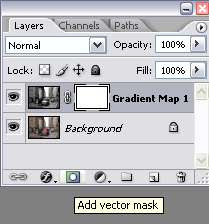
6. Make sure the foreground color is set to black and the background color is set to white. If it's not, click D on your keyboard to set it to default and use the small arrow to switch back and forth between background and foreground color.

7. Select the Brush Tool and choose a soft, round brush. Set the brush size depending on the size of your image. Mine is set to size 13.
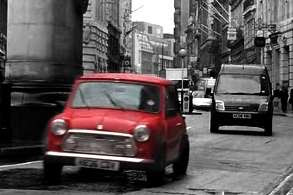
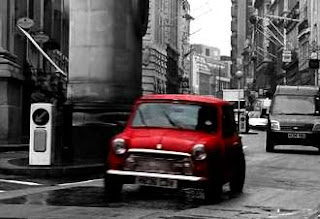
8. Then, just paint on the area where you want the color to be visible. I chose to make the red color of the car to be visible and everything else around it is black and white.
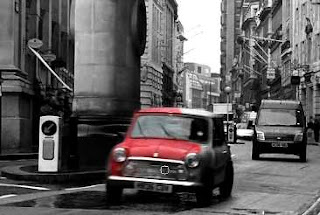
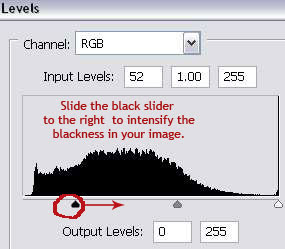
9. From the picture above, you'll see that the red is not really intense and I want the red to be more vibrant. To achieve this, with the original background layer selected in the layer palette, go to Layer > New Adjustment Layer > Levels. Just follow the instruction in the picture below.
10. Here's your layer palette now.
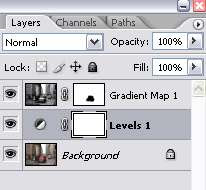
And your image before and after the level adjustment.



13 comments:
This is awesome.
this is really good..but here we turned a coloured image into black n white...i wanted to knw how we cud color an old b&w image...??
great tutorial thanks :p
Great use of masks. The effect looks really cool! Thanks for sharing this tutorial. You write really well too, it's easy to understand and very detailed. Keep it up!
Wow! this tutorial is a keeper. I agree very detailed easy to understand and it makes it easy to do. Alot of people get on the net and don't explain anything,skip steps ussuming everyone knows.
I appreciate your thoroughness and will be sharing this.
step 9 isn't working with me, the red turns black when i try it. I did select the original layer
Maybe try not to slide the black slider too much to the right..and make sure the layers in the layer palette are arranged like step 10.
Step 8 does not work for me. when i use the brush tool on the vector layer, the color is in black colour yet yours is changed to red.
A nice selection of examples and a great tutorial
SUPERB tutorial had some excellent results from a 1st attempt...cant thank you enough!!
thank yOU SOo mUcH Fo sharing!! its a great tutriol!!:)
I tried it on my pic and it turned out perfect!!! - Thanks!!!
Post a Comment