1. Open your image in Photoshop.
2. Duplicate the image.
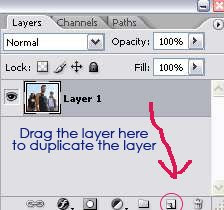
3. In the layer palette, select the duplicate layer by clicking on it once. Go to Image > Adjustments > Desaturate. Now, you'll have a black and white image.
4. Next, duplicate your black and white layer.
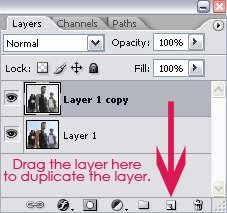
5. With the new duplicate selected in your layer palette, go to Filter > Blur > Gaussian Blur. Set the radius to 3.0

6. Set the blending mode of this layer to Linear Light. And adjust the opacity to around 35-50% depending on what looks nice for your picture.
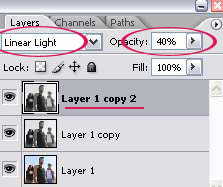
7. Now, take a look at your image. If it's too much black or too much white, carry on with the next step. If your image looks ok ie good balance between blacks and whites, you can skip step 8 and 9.
8. Go to Layer > New Adjustment Layer > Levels. A small window will appear, just click OK and you'll see the Levels setting window. You'll see 3 sliders --> black, grey and white as circled in the image below.

Below are 3 ways you can improve the look of your image. Depending on your image, you may need all three options or you can choose one or two of the options. Just experiment with the settings. See what looks nice.
- Slide the black slider to the right to increase the blacks in your image or make your image darker.
- Slide the black slider to the left to increase the whites in your image or make your image lighter.
- Slide the grey slider to the left or right to get a good balance between blacks and whites depending on your image.
9. Below are my image before and after I applied the level change.
And below is the setting I use for the level adjustment. Remember, yours can be different.

10. Next, go to Layer > New Fill Layer > Solid Color. Pick a color you want. Again, experiment with the colors to find what's the perfect color for your image.
And for my 4 examples above, I use the following colors:
- Emily Deschanel --> color code: 057a23
- Gilmore Girls --> color code: df3d3d
- How I Met your Mother --> color code: 023569
- Heroes --> color code: 635202
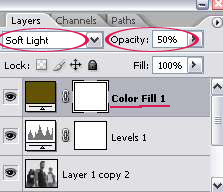
11. Set the color fill layer to Soft Light and opacity around 50%.
And we're done. Maybe you can try this effect on your next poster or get that nostalgic look in your photo album.


1 comment:
Great tutorial. Thank you for the post :)
Post a Comment