Polaroid Frames Brushes for your Pictures

So, you love polaroid pictures..but don't own a polaroid camera. That's a problem we can easily solve with these collection of polaroid brushes. Select your favorite polaroid brushes or frames and upload them in Photoshop. And you'll just a few steps away from having a perfect polaroid theme images.

How you want to use the polaroid brushes is up to you. Be creative...and here's a couple examples to get you started:

P/s: If you're wondering, how did I get the effect on the first image below, find out in a tutorial HERE


Cute Polaroid frames with flowery decorations
Download


Multiple Polaroid Frames
Download


Simple and neat polaroid brush set
Download


Large Vintage Polaroid Brushes
Download


Large and Small Polaroid Frames with Paper Clips
Download


Another Simple Polaroid Brushes
Download


Polaroid and Old Film Brushes
Download


Grunge Polaroid Frame Brushes
Download

READ MORE...

Scenic and Landscape Desktop Wallpapers

Life constantly changes..so why not your desktop wallpaper too? Check out this collection of the most stunning scenic and landscapes wallpapers. Hope you'll find something you like here. Nothing like a serene, high resolution desktop background to keep you inspired...


The Long Road
Download Wallpaper


Sky And Flowers
Download Wallpaper


Paint your World
Download Wallpaper


Hot Air Balloons
Download Wallpaper


City Elements
Download Wallpaper


Spring is Coming
Download Wallpaper


Wake Up in New York City
Download Wallpaper


What a Wonderful World
Download Wallpaper


Running in the Field
Download Wallpaper


Green Green Grass
Download Wallpaper


Sunflowers
Download Wallpaper


I Dream of Heaven
Download Wallpaper


The Old Town Street
Download Wallpaper


Eclipse
Download Wallpaper


This Could be Smallville..hometown of Superman
Download Wallpaper


Season in the Sun
Download Wallpaper


Fatamorgana
Download Wallpaper


Be Free
Download Wallpaper


Home Sweet Home
Download Wallpaper


The Lost City
Download Wallpaper


Eiffel Tower
Download Wallpaper


Message from The Underground
Download Wallpaper


Spring is Near
Download Wallpaper


Futuristic City
Download Wallpaper


Silhouette Sky
Download Wallpaper


The Sunset
Download Wallpaper


Angel of Mine
Download Wallpaper

Credit and thanks to all the talented artists out there who created this wonderful high resolution desktop wallpapers for us to enjoy and cherish and share a glimpse of inspiration.

READ MORE...

Nostalgic Retro Fairytale Look in Photoshop

Hey guys! How's life...hope it's beautiful. Anyways, it's been a while since we last seen a tutorial here. So, I'm gonna write one today. Since time is very limited...for me at least, this is gonna be yet another simple and short tutorial. And if you're time's very limited to, you can skip the tutorial and just download the PSD file..

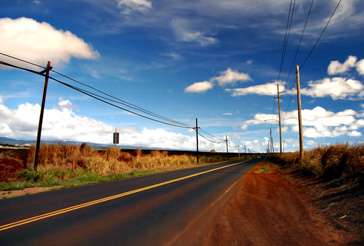
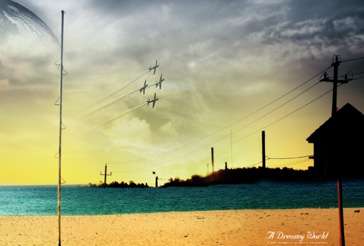
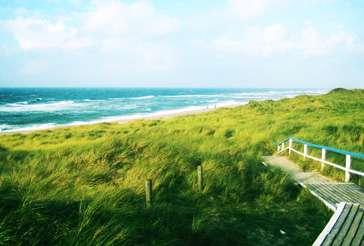
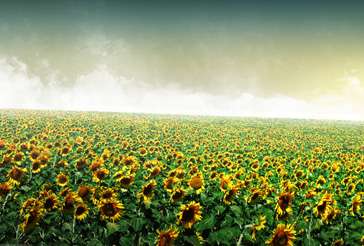
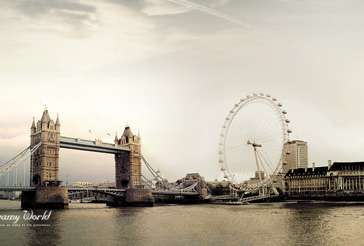
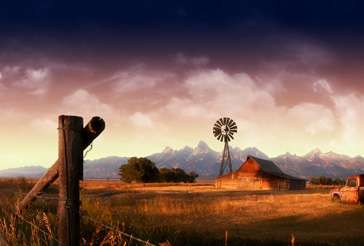
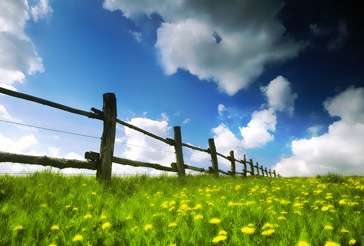
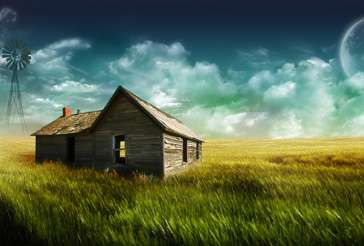
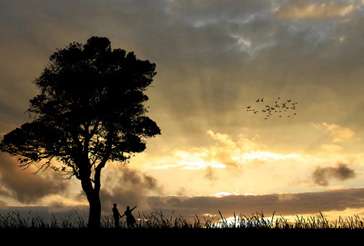
This is one of those image coloring effects..sometimes it works for your photo..sometimes it doesn't. But one thing I can say is..it works well with scenic photograph. It makes the red element in your photos pop up and at the same time giving the nostalgic feeling, retro feeling to your image and makes it looks like a fairytale.


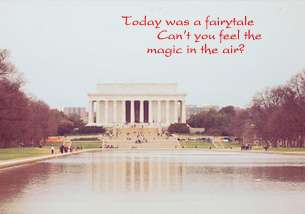
Retro Fairytale Picture Effect


1. Open your image in Photoshop. Duplicate your image.

2. Go to Layer > New Fill Layer > Solid Color. A small window will appear, just click OK. And you'll see a Color Picker window. At the bottom, type in the color code 4681e1(sky blue)..as shown in the picture below. Then, click OK.


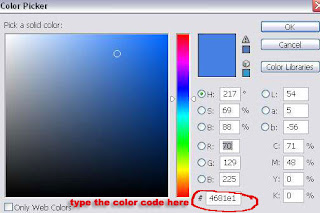
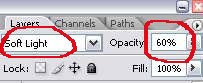
In the layer palette, set the blending mode to Soft Light and reduce the opacity to somewhere around 60%.


3. Create another Color Fill layer. Go to Layer > New Fill Layer > Solid Color. This time choose a really soft brown (code: f0d269) and click OK.

Set the blending mode to Overlay and reduce the opacity to 40%.

4. Again, another Color Fill layer. Go to Layer > New Fill Layer > Solid Color. This time choose a soft pink color (code: e793b5) and click OK.

Set the blending mode to Soft Light and reduce the opacity to 60%.

5. Now, go to Layer > New Adjustment Layer > Channel Mixer. Use the settings shown in the pictures below:

Red:


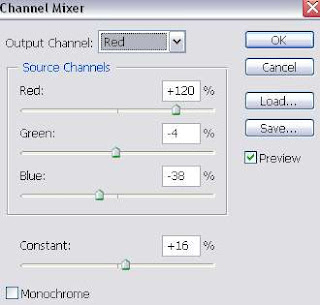
For output channel..Green and Blue, just leave it to their default values. In other word, don't change anything.

6. Next, go to Layer > New Adjustment Layer > Selective Color. Use the following settings:


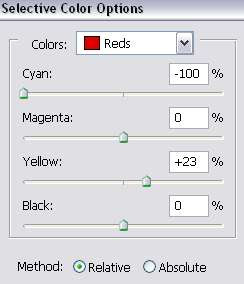
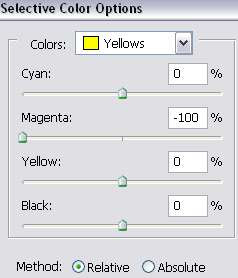
And leave everything else unchanged.

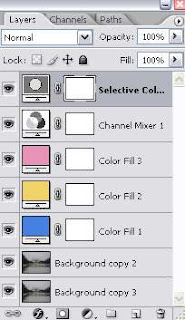
7. Here's your layer palette now.


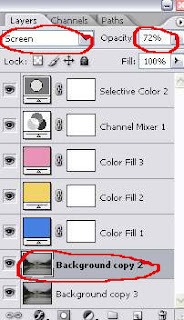
If your image is too dark, set your duplicate layer in step 1 to Screen. Adjust the opacity of that layer until you get a nice coloring on your picture.


Good luck getting this nostalgic fairytale look on your photo. And thanks to all my readers and subscribers..cause honestly my life would suck without you...

READ MORE...

Rule of Thirds Inspirational Gallery

In my previous post, we have learn about the Rule of Thirds. It acts as a guide to achieve a good composition when taking pictures. And in some digital cameras, you have the option to enable the grid lines on your camera screen which makes it easier to take advantage of the Rule of Thirds.

So now, for better understanding of the Rule of Thirds, I present to you some visual aids. All these 20 photographs follow this famous rule in photography to achieve the interesting composition.


Credit


Credit


Credit


Credit


Credit


Credit


Credit


Credit


Credit


Credit


Credit


Credit


Credit


Credit


Credit


Credit


Credit


Credit


Credit


Credit

There you go, 20 inspirational images that follow the Rule of Thirds. I hope these wonderful pictures are enough to get you inspired. So, why don't you pick up that digital camera of yours and start snapping pictures already.
READ MORE...

The Rule of Thirds in Design and Photography

The Rule of Thirds, one of the most popular rules in Photography, can be applied in painting, design and shooting movies too. It's useful to remember this rule when you're taking pictures with your digital camera or later cropping your digital image in Photoshop. In most cases, applying this rule will create a big difference in your image. And yes, it's a good difference.


The rule states that:
1. an image should be imagined as divided into nine equal parts by two equally-spaced horizontal lines and two equally-spaced vertical lines as shown below:


2. important compositional elements should be placed along these lines or their intersections. See examples below:


The focus in this picture are the birds. See how the two birds are placed at the intersections of two lines.


The focus is still a bird. See how the body is placed along the line to the right.


Placing the element of interest on one of the intersections or along the lines will create a balance and interesting look on viewers' eyes. If we put the object of interest in the center, it tends to create a monotonous and static feels. Same thing happens when you place a horizontal element in the middle of a picture.

One thing to remember is, points of interest in the photo don't have to actually touch one of these lines to take advantage of the rule of thirds. Falling near the intersection of two of the lines, close enough to take advantage of the rule.

But you know what people say about having a rule. It's meant to be broken. Sometimes, to achieve a good composition, you have to break the Rule of Thirds. So, don't be too stringent on yourselves. It's okay to break this rule once in a while. It's just here as a guide not to bind you for the rest of your lives.

READ MORE...