Download psd file for this tutorial: Classic Coloring PSD
Classic Coloring Effect - Before and After Image
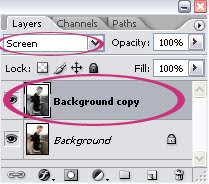
1. Open your image in Photoshop. Duplicate the image and go to Image > Adjustment > Desaturate to get a black and white image. Set the duplicate image to Screen.
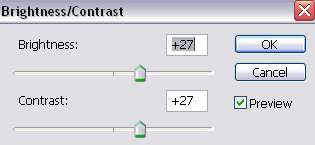
2. Then, go to Layer > New Adjustment Layer > Brightness and Contrast. Use the settings below. Or later, you can always go back and change the setting, depending on what look best for your image.
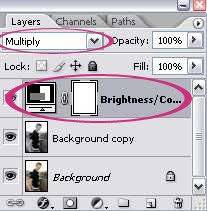
3. Set the Brightness/Contrast layer to Multiply.
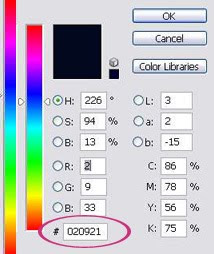
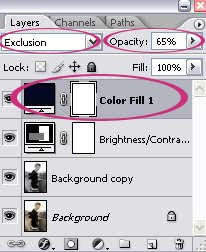
4. Now, we're gonna add that brownish tint to our photo just to give it a little classic look. Go to Layer > New Fill Layer > Solid Color. Type the color #020921 in the box shown below and click OK.
5. Set the Color Fill Layer to Exclusion and adjust the opacity accordingly. Mine is set to 65%. And we're done!


7 comments:
Thank you for sharing!!!
que bueno que nos compartes el truco de como hacer las fotos clasicas gracias!!!
Excellent! Thank you
wow!!!tnx for sharing...i love it
Do you finish by "flatten image" or "merge visible?"
(btw, what exactly is "merge visible"? Thanks!)
merge visible - Merges all layers with the eye icon (visible) into one layer
flatten image - flattens all layers into one layer.
Normally, I just hit CTRL + Shift + E to merge all the layers into one.
Thanks for the tutorial.
Post a Comment