Turn Your Photo into A Vintage Poster

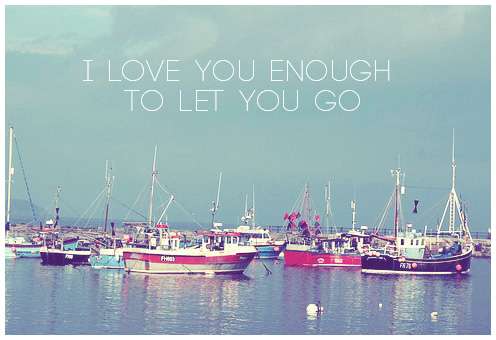
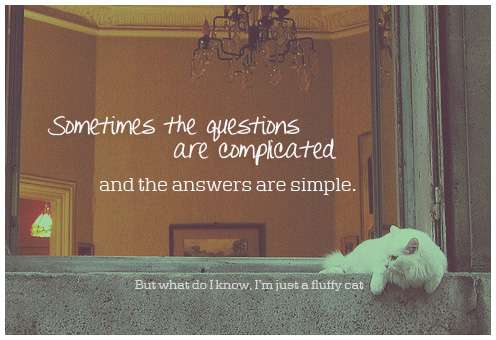
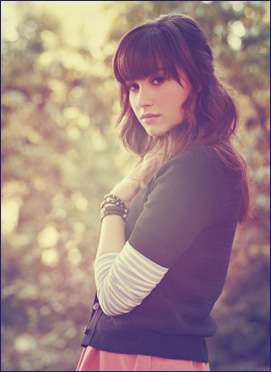
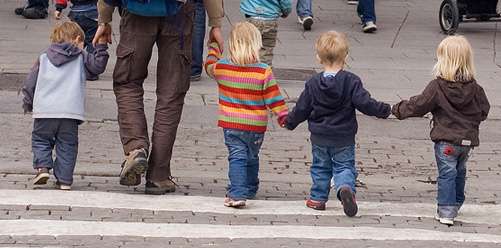
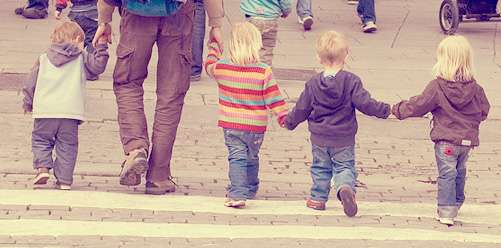
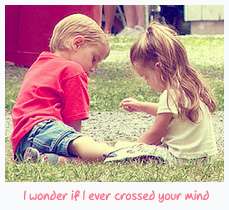
Here is my response to the calling that says, "Pick a photo, apply a vintage effect and write something in Helvetica". Although I don't think I have Helvetica in my computer right now, so I'm just gonna go ahead and pick other appropriate fonts to complete this fun mission. Now the question is, what kind of vintage effect to apply to these photos. After multiple trial and error, I managed to come up with five different vintage effects to finish these retro posters. If you would like to have sort of similar effect on your image, you can download the vintage psd file available for each poster.

Download Vintage Effect PSD 1


Download Vintage Effect PSD 2

Download Vintage Effect PSD 3Original photo by wakalani @ flickr

Download Vintage Effect PSD 4Original photo by karen_roe @ flickr

Download Vintage Effect PSD 5Original photo by hi-phi @ flickr


READ MORE...

Download Coloring PSD: Faded Spring

So we travel back down this road where I will upload a new coloring PSD file for you to try on your image. I have a feeling that we will be traveling down this road many times in the future. So, bookmark this blog or follow us if you would like to come along and enjoy the ride. The more the merrier, isn't that what they always said. For today, I decided to call this coloring effect, Faded Spring. As you can see, it kinds of eliminate the vibrant coloring of the original image and adds that old and vintage feeling to the picture. You can read our tutorial on How to Use PSD File to familiarize yourself with this method of image editing.

Download: Faded Spring PSD


Download Coloring PSD: Dark Chocolate

I've been posting PSD file every Tuesday for two weeks in a row now. I might as well start calling this event PSD Tuesday..like that song Ruby Tuesday. {Well, to be honest I wasn't really familiar with that song until someone sang it on American Idol}. Enough with my rambling. I'm calling today's color effect, Dark Chocolate. Apply this effect to the right photo, you'll see the similarity with the color of chocolate you eat. Or sometimes, it'll give you the golden color of summer too. {Just typing this makes me wanna check out my fridge if there's any chocolate left from last week}. As usual, you can check out this tutorial on How to Use PSD File if you don't have any clue how to use the download PSD.

Download PSD: Dark Chocolate


Download PSD Coloring: Summer Sunshine

For those interested in color-editing your image in Photoshop, here's another Psd file for your download with more to come in the near future. So, if haven't been a follower to this blog, you might consider of becoming one, because we only post awesome stuffs here and you wouldn't want to miss that, do you? I'm calling today's coloring, Summer Sunshine. I believe you can figure out the reason yourself. Apply it on your outdoor image and you'll get the feeling of summer all year long. If you haven't used any Psd file before to edit your image, we have a short tutorial on how to use coloring PSD file.

Donwload PSD: Summer Sunshine


Download Coloring PSD: Caramel Coffee

This post is for photographers (professional or not) who love to post-process their photos in Photoshop. It is also for die-hard fans who spend their free time downloading their favorite artist's pictures from the internet and make fanarts out of them. Whatever your purpose is, I hope you're gonna like the outcome of this coloring on your photo. It's not complicated and I know you want to try it. So, just download the free PSD file and start editing your image to get the kind of brownish coloring as shown in the preview below. I hope you're all familiar with using PSD file. Otherwise, you can try to read a short tutorial on How to Use Psd File.

Download PSD: Caramel Coffee Coloring


Project Pop Art : Download PSD

If you've been checking out this blog and realize there's no update for the past 2 weeks. Don't worry, it hasn't been abandoned yet. No matter how much fun I have in real life, I always come back here. Today, I come out with this fun and colorful project. I'd like to call it Project Pop Art. Of course it doesn't define pop art as a whole, but I guess there's certain element in this project that I can relate to pop art. This is actually a simple photo coloring project. Don't be intimidated by the word 'Project'. It's just there because I said so. You can see the preview image below. Then, try it yourself by downloading the PSDs. The preview image below is a combination of four colorings I had in this post. With the help of layer mask in Photoshop, I was able to combine the four colors in one image. I also applied stencil effect on the image to amplify the pop art look of the photo. Learn how to: Apply Stencil Effect on Your Photo and download the PSD for the preview image HERE.


Download: ZIP file of all the Pop Art Colors or you can download the color individually by clicking on each preview image.


READ MORE...

Mosaic Photo Effect PSD Template

Hello fellow readers! How's your day? If it's not so much of a story to brag about, we hope it's gonna get better with this update. Here's another free PSD template from Best Photoshop Tutorials for you to download. This time it's a Mosaic Photo Effect PSD template. It is fairly easy to use and self-explanatory once you downloaded the psd file. But we still gonna write a short guide, just to make sure nobody got lost in translation. Below are two examples of how you can utilize the template in your project. But don't limit yourself to these two samples, try to think outside the box (if you're ever inside one).

Download PSD: MOSAIC PHOTO EFFECT PSD


1. Of course first you have to download the psd file. Then, open it in Photoshop.

2. By default, the template is set to landscape. If you prefer to work with portrait orientation, you can rotate the canvas. Go to Image > Rotate Canvas > 90 degrees CW.


3. The canvas size is 1024 x 768 pixels. You can always re-size or crop it later once you're done arranging your pictures inside the squares. Each square/box is approximately 128 x 128 pixels and we have 8 x 6 boxes.

4. Below is your layer palette. Now, what you have to do now is open all the images you want to work with in Photoshop. You can use one big image to fill in the template or you can use several small pictures.


5. Drag your image one by one on top of the template's sample image layer. Re-size or crop them if necessary. Make sure the 'Frame' and 'White Box' layers always on top of your dragged images (otherwise you cannot see the boxes).


6. One you finished arranging your pictures, you can adjust the opacity of the white boxes.


7. Now, merge all the layers (CTRL+SHIFT+E). Then, you can re-size the image. Or crop some of the unused squares. (I'm gonna assume everybody knows how to resize or crop image in Photoshop. Otherwise, leave a comment here, and I'll be happy to help).
READ MORE...

Download Retro Gradient Coloring PSDs

Let me explain a little bit about my retro gradient coloring. It is actually a collection of photo colorings that I thought can safely be considered as somewhat retro or classic. All the color effects are achieved using gradient map in Photoshop. I've created some psd files for you to download. I know most of you already familiar with using PSD file, but for some who's still trying to figure it out, here's how you do it. Download the psd file. Open it in Photoshop. Open the image you want to apply the color effect in Photoshop. Drag the gradient map layer onto your image. Also, I have some other posts about gradient map. It'll be a wise idea for you to check them out if you're interested to learn more about gradient in Photoshop. Discovering Gradient Map, Download Free Photoshop Gradient and Another Set of Gradient Image Coloring PSD

FYI, my retro gradient coloring is inspired by below vintage color palette. If you can see the similarity, that's good! If you don't, just go with it, will you? You can download the retro color swatch by clicking on below image.

Download Vintage Color Swatch

Click on the preview image to download the color effect individually or if you like them all, you can download a zip file contains all 9 PSDs HERE


READ MORE...

Download Gradient Photo Effect PSD

What can you do with gradient? If your answer is nothing much, then you should think again. Gradient is such a simple tool in Photoshop, but once you've discovered the amazing photo effects you can get out of it, Photoshopping becomes much more fun. To learn more about gradient map in Photoshop, you can check out our previous tutorial on: Discovering Gradient Map in Photoshop. Today, we're posting some PSD files that you can download to get the coloring effects shown below. How to efficiently use this PSD? Well, first, open your image in Photoshop (Doesn't matter the size). Then open the downloaded PSD file in Photoshop. Drag the Gradient Map layer and drop it on top of your opened image.

Download the PSD individually by clicking on each preview image.

Or you can get them all in this zip file - Gradient Photo Effects


READ MORE...

Download Image Coloring Effect PSD

All these time, our photo just came out straight from the camera. Most of us own a DSLR today, or at least a high-end compact camera. They sure produce some amazing photos. Why not we try something new today and upgrade that amazing photo into something more awesome. Open those digital photos in Photoshop and apply this coloring psd on them to enhance the color and get the effect you've been dreaming of. Since every photo has it own properties, your result might not be exactly the same as the preview image. But try adjusting the opacity of the layers to make it just nice for your image. If you're not sure how to handle these PSDs, don't be intimidated. Check out this tutorial on How to Use Coloring PSD.

Download PSD: Click on the final image preview


READ MORE...

Classic Coloring Effect on Your Photo

Ever look into a fashion magazine and wonder how they got that classic coloring look on the model? Well, this tutorial can show you how. It might not be the most accurate answer, but it'll give you an idea on where to start. This is a simple 5-step tutorial because we all need a little simplicity sometimes, when we live in the world where things are getting more and more complicated. Start with a good image and you'll get a nice effect. PSD file included.

Download psd file for this tutorial: Classic Coloring PSD


Classic Coloring Effect - Before and After Image


1. Open your image in Photoshop. Duplicate the image and go to Image > Adjustment > Desaturate to get a black and white image. Set the duplicate image to Screen.


2. Then, go to Layer > New Adjustment Layer > Brightness and Contrast. Use the settings below. Or later, you can always go back and change the setting, depending on what look best for your image.


3. Set the Brightness/Contrast layer to Multiply.


4. Now, we're gonna add that brownish tint to our photo just to give it a little classic look. Go to Layer > New Fill Layer > Solid Color. Type the color #020921 in the box shown below and click OK.


5. Set the Color Fill Layer to Exclusion and adjust the opacity accordingly. Mine is set to 65%. And we're done!


READ MORE...

Image Coloring PSD : Dream Big Vol 2

Hey fellas! How's the new year treating you? Better than last year..I hope. Last week I wrote an exclusive (sort of) post about the launch of my DREAM BIG ACTION SET : VOL 2. If you're some kind of photographer and aim for a better picture, try it. It's free so you've got nothing to lose. And now I'm including some PSD files to accompany the Action Set. We don't want them to get lonely, do we? Before I forgot, here's some tips on How to Effectively Use the PSD Files.

Download PSD Files: Look for the link below each preview image

Download Action Set: DREAM BIG ACTION SET - Vol 2


Red Popping X-Process in Photoshop: Wildfire.psd


Retro Coloring Enhancement: RainbowsAndButterflies.psd


Enhance Portrait Color: Dynamite.psd


Sunshine Effect: ImagineYouAndMe.psd
READ MORE...

The Polaroid Coloring (you've been looking for)

In this modern world, almost anything is possible. To say nothing is impossible might be a statement of exaggeration but it's not hard to believe that it's possible for you to get a polaroid picture without having to buy a polaroid camera. The picture might not pop right away from your camera but some simple post-processing in Photoshop can make a great digital polaroid photo. Not long ago, I wrote a tutorial on how to achieve the polaroid coloring effect on your digital photo. But we're all very busy nowadays and who has time to read a tutorial anyway. So, simplify your life and download the action or psd file instead, whichever you feel comfortable working with (I'm all about option here). If this is the polaroid coloring you've been searching for, go ahead and download otherwise you'll just have to keep looking.

Download Polaroid Coloring Action file

Download Polaroid Coloring PSD file


Original photo by fiskfisk @ flickr


Original photo by fiskfisk @ flickr

Polaroid Coloring Effect in Photoshop


More samples:

Original photo by eqqman @ flickr Original photo by machado17 @ flickr


READ MORE...

Fade the Coloring of Your Photo: PSD

I have uploaded the action for this coloring HERE as part of the Dream Big Action: Volume 1. But for those who doesn't want to be bothered what action is and rather work with psd file instead, I guess today is your lucky day. Download the psd file and I'll show you how to get various coloring from the same psd. As you know, when working with different image, the result may turn out differently as well. So, use the steps below as a guide for you to adjust the settings of the layers to get the best outcome for your image.

Download psd file: FADE AWAY PSD
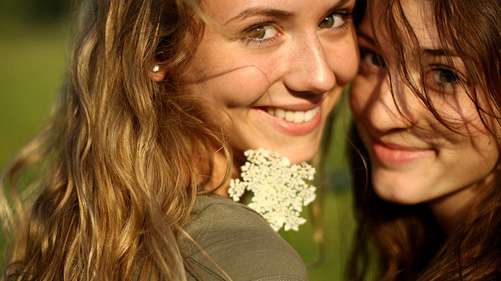

Original photo by eflon @ flickr
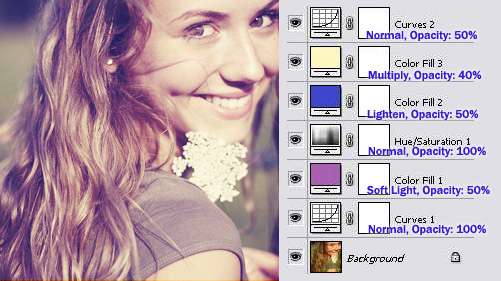
Original photo by eflon @ flickr


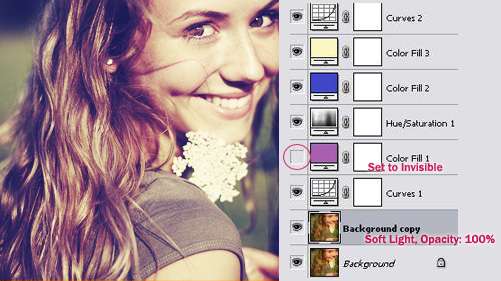
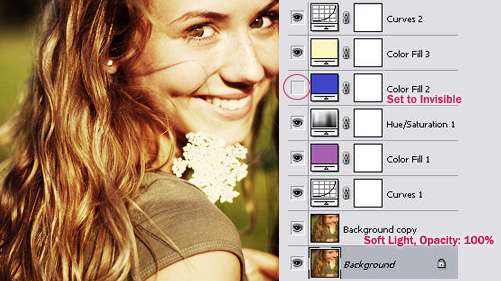
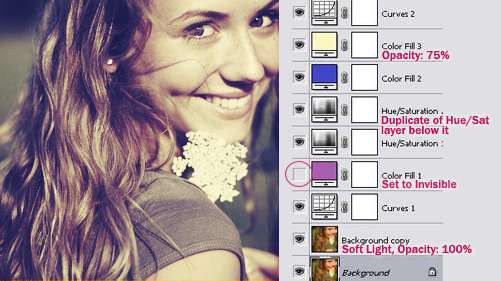
When you download the psd and use it the first time on your image, you'll have the settings above as default. To get different coloring on your image, you need to change the blending mode or opacity of some layers.

So, to get each coloring shown below, you need to change the setting of the layers indicated by the red text and leave everything else as it is.



READ MORE...

Soft and Warm Coloring in Photoshop

As much as I love taking photos, I also enjoy processing them in Photoshop. Most of the time your expensive DSLR camera works wonders but sometimes you just need a little bit of adjustment in Photoshop to get the kind of coloring that suits the mood of your photo. So, here's another free Psd for your download. It gives your photo this soft and warm coloring, with some yellow and cyan hue. Depending on your photo, sometimes, you may end up with a little greenish result. A little tip to avoid this: Try adjusting the opacity of the adjustment layers until you get something nice.

Download: Soft and Warm Coloring PSD

How to Use PSD File


Before and After Image Preview:


Soft Pink Coloring Photo Effect

The key to getting this nice and soft pink coloring on your image (as in any other effect mostly) is to start with a good photo. The one that has enough exposure and contrast. This is like the rule of thumb or something. After that, your post processing step is just downloading the free PSD file offered here, open the file in Photoshop and drag the layers above your image. You can do a little tweaking on the opacity of each layer to get the desired coloring effect for your image. I have come to believe that this pinkish and classic coloring works well with portrait to emphasize the softness of the subject.

Download Soft Pink Coloring PSD


Must Download: 5 Basic Photo Coloring PSDs

Five basic photo coloring effects that will come in handy when you're creating a memorable photo album. Black and white photo coloring, sepia tone coloring, soft blue-green coloring, polaroid photo coloring and the colorful gradient effect. All effects are achieved in Photoshop using the adjustment layers, making it flexible for you to adjust the settings according to your image condition. Learn more about: The Advantage of Using Adjustment Layers When Editing Your Image.

Click on the image to download the PSD files
Find out: How to use PSD file

Black and White Photo

Polaroid Coloring Photo


Colorful Gradient

Blue-Green Matrix Coloring

Sepia Tone Photo
READ MORE...
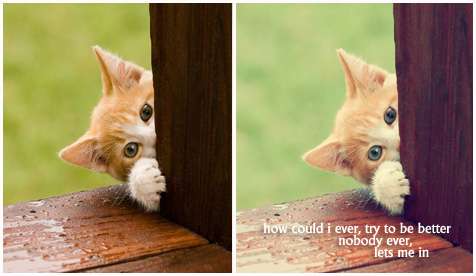
Make the Reds Pop in Photoshop

Because ordinary picture is not an option..I'm gonna teach you how to achieve the extra-ordinary color in your digital photograph. We're gonna figure out how to make the reds pop and the yellows mellow..if you have blues, then, we'll just make them sparkle. How about all that for a very cool postcard..or a little bit of awesomeness to add to your digital art. And PSD file is included at the bottom of this post.

Just how popping the reds will be? Take a look at some examples below..


1. Open you image in Photoshop. Preferably, use the image with some reds on it. Otherwise, you're defying the whole purpose of this tutorial.

2. Duplicate your image. Set the layer mode to 'Screen'. And the opacity setting will depend on what type of picture you have. If it's a slightly dark picture, use high opacity setting. Or add another Screen layer if necessary. Just pick a number now. Later, when you're done with all the steps, we can still adjust the opacity for the best result. Unlike life decision, we always have a rewind button here.

3. Next, duplicate the image one more time. Set the layer mode to 'Soft Light'. We're trying to make the overall color pops. Set the opacity around 40 - 50%...or whatever lucky number you like.

4. Now, go to Layer > New Adjustment Layer > Selective Color.
Use the settings below for Reds.


And use the settings below for Neutrals. Click OK.


5. Next, go to Layer > New Fill Layer > Solid Color. Set the color value as shown below.


Set this Color Fill layer mode to Exclusion at 100% opacity.


6. Again, go to Layer > New Adjustment Layer > Selective Color. A little bit more work to do here. Set the settings as follows:


7. Next, go to Layer > New Fill Layer > Solid Color. Set the color value as shown below.


Set this Color Fill layer mode to Lighten at 70% opacity.

8. Again, go to Layer > New Fill Layer > Solid Color. Set the color value as shown below.


Set this Color Fill layer mode to Exclusion at 80% opacity.

9. I promise you, this will be last Color Fill layer you need to do. Go to Layer > New Fill Layer > Solid Color. Set the color value as shown below.


Set this Color Fill layer mode to Exclusion at 10% opacity.

10. Next, go to Layer > New Adjustment Layer > Curves. We're just gonna do the S-curve for the Reds and the inverted S-curve for the Blues. See images below:


We're actually done here. But if your image doesn't look so good, you can go back to some of the layers and adjust the opacity, until you got something good. If still no improvement, then maybe today's not your lucky day..try again tomorrow =)

Unlike your boss, it's always our goal here to make your life easier. Don't feel like reading the whole tutorial? Maybe just download the PSD file below and start working from there.

DOWNLOAD RedPOPPING PSD
READ MORE...

Cross Processing Photo in Photoshop

This will be my last post....in 2009. Tonight or tomorrow (depending on which time zone you live in), we'll be celebrating the NEW YEAR! And there will be lots of pictures captured by your camera..So, I think it's a good idea to close our chapter in 2009 with a photo cross-processing tutorial.

When film was widely used in photography, cross-processing is defined as the procedure of deliberately processing photographic film in a chemical solution intended for a different type of film. Color cross processed photographs are often characterized by unnatural, retro colors with high contrast. (according to Wikipedia..well, I would never come out with such technical words on my own).

And today, cross processing effects can be simulated in digital photography by a number of techniques involving the manipulation of contrast/brightness, hue/saturation and curves in image editors such as Adobe Photoshop. And I'm gonna show you how to do Xpro with the Curves adjustment layers.


1. Open your image in Photoshop.

2. Next, we'll add some contrast to your photo. Go to Layer > New Adjustment Layer > Curves. Most image will do fine with an S-shaped curve. See image below on how to create an S-curve.


How steep your S-curve depends on your image. If you want steeper curve drag the upper point upwards more and the lower point downwards more. Below is my S-curve.


3. Now add one more curve layer. Go to Layer > New Adjustment Layer > Curve. Select "Red" as the channel. And again do that S-shape curve as shown below.


4. Don't close the Curves window yet. Select "Green" as the channel. And do the S-shape curve again.


5. Now, we'll continue with the 'Blue' channel. This time do the 'Inverted S-shape'. How you do it? Drag the upper point downwards and the lower point upwards. You'll get something like below.


After finishing with all the channels (Red,Green and Blue), click OK. Here's my layer pallete now.


And my final image..


Image credit

Ps: Remember, the shape of your S-curve depends on your image. Experiment with it until you got something you like.

And as a NEW YEAR's gift, I include the PSD file also free of charge.
-- DOWNLOAD CROSS-PROCESSING PSD
READ MORE...