1. Open your image in Photoshop. Duplicate your layer.
2. Go to Layer > New Fill Layer > Solid Color. Choose white or whatever color you want. This layer will be your background.
3. Copy your source text. It can be from a song, article, story or you can always type in your own words. Select the Type Tool (T). Click and drag your cursor diagonally on your image to form a dashed box. We are going to fill in the area inside this box with text. So, it's good to make the box slightly bigger than your canvas size just to make sure all area of your image is covered with text.
Paste your text on the canvas. You can see it has covered all your image area. If your image is big and your font size is small, you're gonna need lots and lots of words.
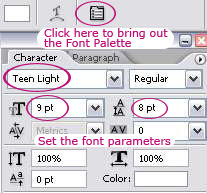
4. Looking at the current text, you can adjust the font type and font size to whatever looks good for you. I chose the font called Teen Light and set the size to 9 pt.
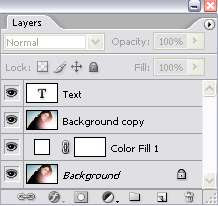
5. Now, re-arrange your layer palette so it's look like below. Your original image at the bottom, followed by the Color Fill Layer, then your duplicate image layer and on top is your Text Layer.
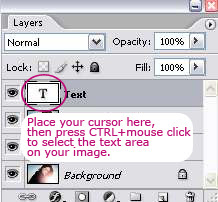
6. Place your cursor on the text layer, then press CTRL + left mouse click to select the text area.
7. You'll see on your canvas that the selection has been made on the text. Now, select the Rectangular Marquee Tool (M). Put your cursor on your image until you see a small dashed-box icon. Then, right click and choose 'Select Inverse'. What we're doing here is selecting the area outside of the Text.
8. Go to your layer palette and click once on the duplicate image layer to choose that layer. Next, hit the DELETE key on your keyboard. Click CTRL + D to turn off the selection. Now, we have eliminated the part of our image not covered in text.
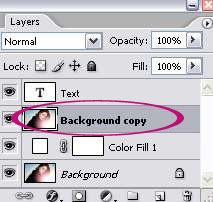
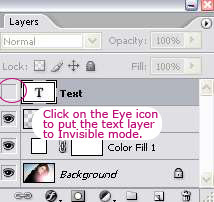
9. To see our remaining image, put the text layer to invisible mode.
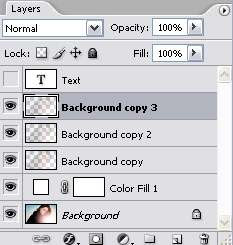
10. You can duplicate your image a few times to get darker effect. I duplicate it twice as you can see from my layer palette below. And my final outcome as shown in our first preview above.
*If you want effect like our second preview, start with an image with white background. Choose bigger font size (and perhaps a different font).
*If you want image like our third preview, in step 3 and 4, instead of covering your whole canvas with text, just type the words or sentence you want to be seen on the canvas. Of course choose much much bigger font size.


6 comments:
Thanks again! I just love your tutorials. This one is pretty easy. I always thought it would be difficult but thanks to you it's not anymore.
it was really nice Photoshop tutorial! I'll try soon :)
Very neat. My first photoshop experience!
Fantastic! I had to try it right away and love the results! I used a close up of my daughter and copied the Martina McBride lyrics "In My Daughter's Eyes". Perfect!
Hi Denise,
I'm sure it looks lovely ;)
love this tutorial thanks for sharing!
Post a Comment