Halftone Wave Photo Effect
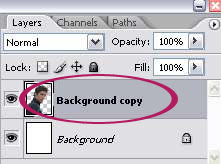
1. Open your image in Photoshop. Duplicate your image. We're gonna work with the duplicate image and leave the original image untouched. Perhaps, we can set the original image layer to invisible.
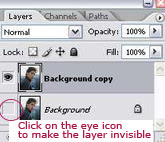
2. Next, we're going to remove the background of the image and replace it with a clean white background. If you already have a white background or just decide to apply this effect to your whole image, you can skip step 2a-2f.
There are several ways to remove the background. But today, I'm going to use the Extract Filter. Now, you can learn more detail about this method in my other post on How to Remove Background with The Extract Filter. Or you can save that for later reading and just follow step 2a-2f below.
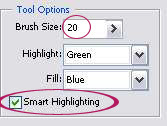
2a. Go to Filter > Extract. The Extract Window will open. Choose the Highlighter Tool on the top left. Set the brush size to around 20 and select Smart Highlighting.

2b. Trace around the edge of your subject and close the path. Don't worry too much about precision when you're tracing the hair area (or any other area for that matter). Trust me, in this photo effect, the messier, the better.

2c. Now select the Fill Tool. Click on the subject (inside the traced area) to fill the area with sort of purple color. This purple area will be retained while the background will be deleted. Press the OK button.


2d. Below is your result. We have successfully removed the background from the image.

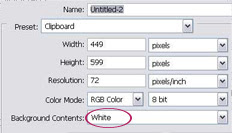
2e. Open a new file in Photoshop. Perhaps the canvas size should be slightly bigger than your image in 2d. Set the Background to White.
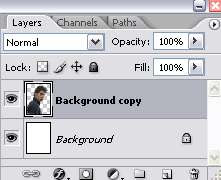
2f. Drag the image you have extracted in step 2d onto the new canvas. Below will be your image (with white background) and your layer palette.
3. With your image layer selected on the layer palette, go to Image > Adjustment > Desaturate.
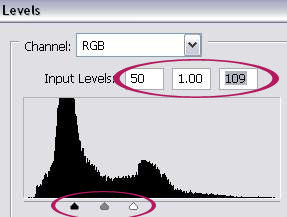
4. Then, go to Image > Adjustment > Levels. Drag the black slider to the right, and the white slider to the left until you got something like below image.
5. Then, go to Image > Mode > Grayscale. If asked whether to Flatten your image, just click Flatten.
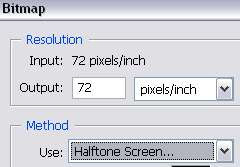
6. Now, go to Image > Mode > Bitmap. Use the default setting as your resolution and set the method to halftone Screen. Click OK.
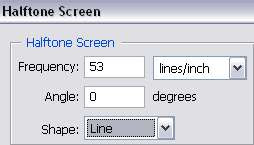
7. The Halftone window will open. The frequency setting actually depends on your image size and what kind of final effect you want on your image. You can experiment with several frequency and shape settings until you get the look you want for your image. My image size is 4x5 inches and I set the frequency to 53 lines/inch. Set the angle to 0 and Shape to Line.
8. Below is the halftone effect I got.

Now, we going to add some colors to our image. Convert the image mode to grayscale. Go to Image > Mode > Grayscale. And to work with color, convert it to RGB mode. Go to Image > Mode > RGB Color. They are many ways you can add color to your image. First is using Gradient Fill Layer as shown in step 9.
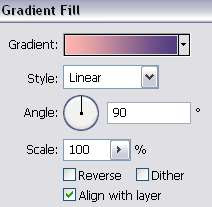
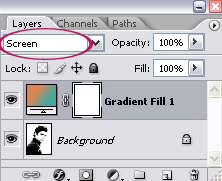
9. Next, go to Layer > New Fill Layer > Gradient. I select one of the gradients I have installed in my computer and click OK. For more gradient option you can download some from our Gradient Collection. After you're done selecting the gradient, set the blending mode of the gradient fill to Screen.
And below is your final image.

10. Another way to decorate your image is to add some colorful textures on top of your image layer and set the blending mode to Darken or Multiply like what I've done on my initial preview result. Adjust the opacity if necessary. Try some of our Colorful Abstract Texture Collection.


No comments:
Post a Comment