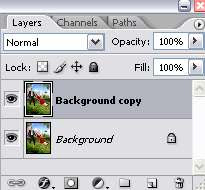
1. Open your image. Duplicate the image.
2. With the duplicate layer selected in the layer palette, go to Layer > New Adjustment Layer > Channel Mixer.

On the first pop-up window, click OK. Then, you'll see the channel mixer window.

Check the Monochrome box. Then, adjust the Red, Green, Blue and Constant settings. Each image will have different settings. So, just experiment with the values here until you find the perfect fit for your image. Sliding the slider to the right will bring out the whites. And sliding it to the left will increase the black on your image.
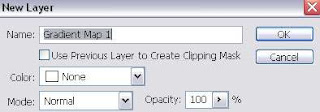
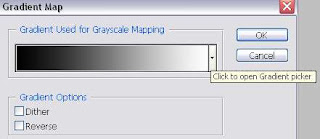
3. Next, go to Layer > New Adjustment Layer > Gradient Map. Click OK on the first pop-up window.

And this window will appear. Select the Black, White gradient and click OK.

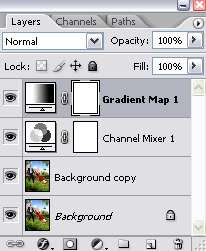
4. Here's your layer palette now. And you're done =)


6 comments:
Hi,
My name is Andrew. I am a moderator and interpreter for the Russian Internet Art website and forum - www.arttower.ru. Our resourсe is dedicated to gathering and sharing information about Computer Graphic Design, Digital and Traditional Arts, and Photography.
We specialize in writing and translating different lessons, tutorials and articles from foreign languages into Russian. We also are giving our own tutorials and tips, making our website informational for the guests and users.
We find your website very interesting and we would like to request your permision for translation of your Create Professional Black and White Photography in Photoshop and other photoshop lesson. We will provide the proper credits and direct links to the originals. We promise that we won't use it for comercial purposes. The example of the reference you can find here http://arttower.ru/forum/index.php?showtopic=1144 Upon the request we will send you the links to the translations for your personal use and records.
Would you mind if we post the translations of your work on our website? Our users will be thankful for this valuable information.
Thank you and I hope to hear from you soon.
Sincerely Yours,
Constantine
Hi Andrew, thanks for your interest in this tutorial.
Sure you can post a translated version on your site. Just please host all the images yourself ;) and I appreciate a link back to the original tutorial...
-Ace
thanks. may i translate other your lessons on arttower.ru with links to original lessons on your site?
what is the gradient map for? it adds some contrast, but I don't see a higher/obvious purpose for it.
You can have more control when converting your images to black and white by using an adjustment layer.
I wrote a tutorial on using selective coloring in photoshop the other day.
In it there is an example of using the black and white adjustment layer.
Ace, your d best! pls continue inspiring us!Thank you so much for sharing your knowledge. I got a degree in Computer and i love editing pictures. Your tutorial is so easy to follow.
Two thumbs up on you!
-Maryland,US-
Post a Comment