*Don't forget to visit our blog next week. We will post some wonderful gradient effect PSD files for you to download. Update: Download the Gradient Effect PSD here
1. Open your image in Photoshop
2. Go to Layer > New Adjustment Layer > Gradient Map. A small window like below will pop up. Just click OK.

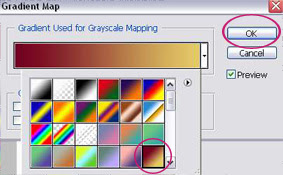
Then, you'll see a Gradient Map window. Choose one of the preset gradient you have. Look at your preview image to see which one suits your photo. After that, click OK.
3. You can also try changing the blending mode of the Gradient Map layer to get different effect on your image. See the picture below for guidance.
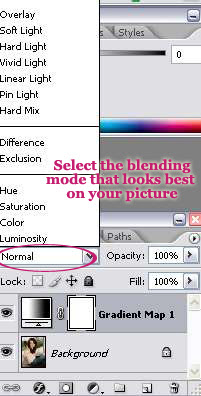
And below is two effects we got from the same color gradient by changing the blending mode of the Gradient Map layer.
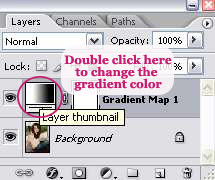
4. Now, we're gonna show you how you can customize the color of your gradient to get the effect you want. Double click on the Gradient Map thumbnail on your layer palette to edit the gradient.
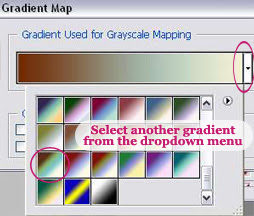
5. A gradient map window will appear. You can select another gradient from the available selections and click OK.
6. Or as an alternative, you can create your own gradient. Here's how you can customize the color of the gradient.
Click on the gradient color (as shown in by the image below) to bring up the Gradient Editor window.
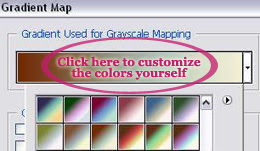
7. On the Gradient Editor window, click on each color stop to change the color (see image below). A color picker window will open. Choose your color and click OK.
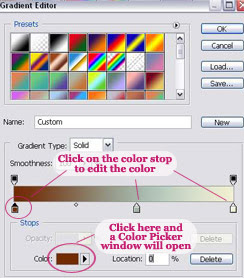
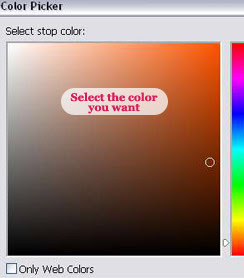
You can add more color stops by dragging your mouse near one of the color stop. You can delete a color stop by clicking on that color stop and hit the DELETE button at the bottom right.
Once you've got all the colors adjusted. Hit OK on all the pop up windows to return to your image. Now that you've learn a thing or two about gradient map, how about trying the some photo effects with our retro gradient map psd.


2 comments:
Your blog is really helpful for photoshop tutorial & lots of tips!
many many thanks for sharing this nice post!
Well explained tutorial.
Post a Comment