Cross Processing in Photoshop: Dream Big Actions Volume 2

Happy New Year! Some people start their new year with a new resolution. But I still have a few of unresolved resolutions from last year. So, I'm gonna kick off 2011 with a new blog post instead and just see how it goes from here. If you haven't check out part 1 of this post, you can find it HERE. More than 500 fans had downloaded the action set and I hope at least 90% of them are happy with the result. If you don't know what action is, maybe 2011 (who knows what's gonna happen in 2012) will be a great year to start learning about it HERE or some other place. Trust me, it'll only make your life easier. And without further ado, I'm launching part 2 of the action set. I hope you'll have some fun playing with it.

Download Action: DREAM BIG ACTIONS - VOLUME 2

Download PSD Files: DREAM BIG PSD - Vol 2

How to Use: Guidelines to Use our Photo Coloring Action


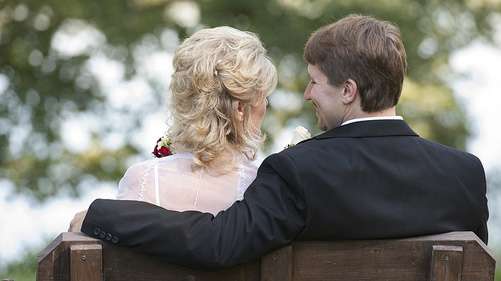
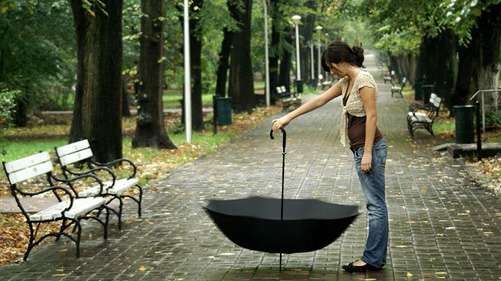
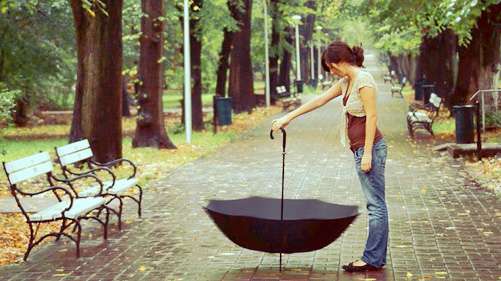
Original photo by jasonpier @ flickr

Dreamy coloring Photo
Soft and Dreamy Effect {Imagine You and Me}


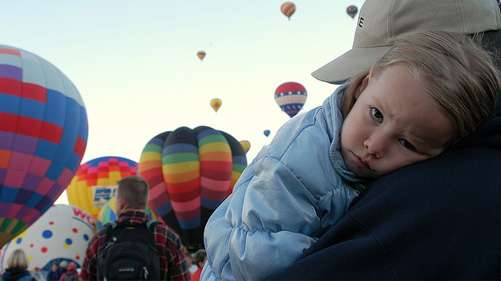
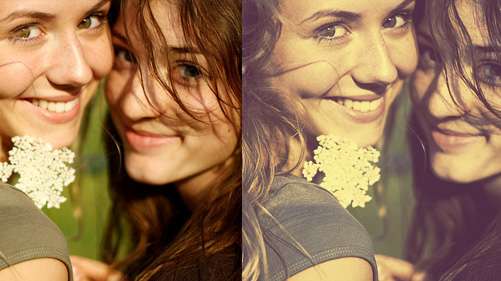
Original photo by jetsetwilly @ flickr

Enhance Portrait Coloring
Lighten up your Portrait Coloring {Dynamite}


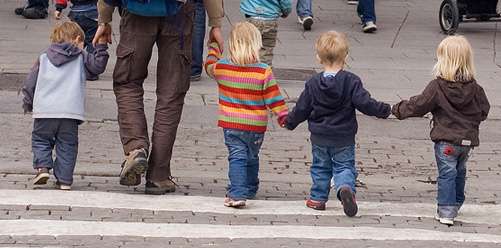
Original photo by martinlabar @ flickr

X-process in Photoshop
Pop the Red and Yellow in Your Photo {Wildfire}


Original photo by adwriter @ flickr

Image coloring Action
Retro Old Coloring in Your Photo {Rainbows and Butterflies}


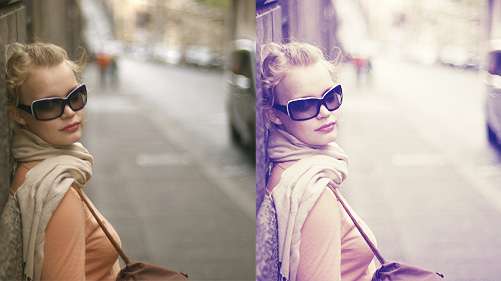
Original photo by a4gpa @ flickr

Brownish Color Effect
Crystal Clear Brownish Effect {Coffee City}

I would love to see your result with this action. Leave a comment and share it with the rest of our friends here ;)

READ MORE...

The Polaroid Coloring (you've been looking for)

In this modern world, almost anything is possible. To say nothing is impossible might be a statement of exaggeration but it's not hard to believe that it's possible for you to get a polaroid picture without having to buy a polaroid camera. The picture might not pop right away from your camera but some simple post-processing in Photoshop can make a great digital polaroid photo. Not long ago, I wrote a tutorial on how to achieve the polaroid coloring effect on your digital photo. But we're all very busy nowadays and who has time to read a tutorial anyway. So, simplify your life and download the action or psd file instead, whichever you feel comfortable working with (I'm all about option here). If this is the polaroid coloring you've been searching for, go ahead and download otherwise you'll just have to keep looking.

Download Polaroid Coloring Action file

Download Polaroid Coloring PSD file


Original photo by fiskfisk @ flickr


Original photo by fiskfisk @ flickr

Polaroid Coloring Effect in Photoshop


More samples:

Original photo by eqqman @ flickr Original photo by machado17 @ flickr


READ MORE...

Photo Color Cross Processing in Photoshop: Dream Big Actions Volume 1

Taking pictures is fun. With the camera gone digital, you can snap at almost everything that catches your eyes without having to worry about running out of film. And here's another plus point of keeping digital image..you can explore the much more interesting world of photo cross-processing in Photoshop (provided that you have Photoshop). Sometimes, although your composition is great, the coloring of your photo is just average, and doesn't evoke the kind of feeling you wish to convey to the audience. Well, that is why I have created this free coloring action set. I've decided to call it the 'Dream Big Action: Volume 1' because you should always dream big and there might be possibility for Volume 2. The set contains 5 actions and you can see the preview result of each action below. So, run these actions in Photoshop and start turning your dull photo into something marvelous. You still have a long way to become a professional photographer but at least you can impress your friends now with these unique colorings.

Download Action: DREAM BIG ACTIONS: VOLUME 1

How To Use: Guidelines To Use Our Photo Coloring Action

Original photo by ovizo0n @ flickr
Action: Today is a Fairytale
*PSD file coming soon, so bookmark or follow this blog so you won't miss it


Original photo by eflon @ flickr

Action: Shine for You
*PSD file coming soon, so bookmark or follow this blog so you won't miss it


Original photo by mikebaird @ flickr
Action: Chocolate Eyes
*PSD file coming soon, so bookmark or follow this blog so you won't miss it


Original photo by wili @ flickr

Action: Fade Away DOWNLOAD THE PSD FILE


Original photo by eole @ flickr
Action: Pink Roses
*PSD file coming soon, so bookmark or follow this blog so you won't miss it


"Today is a fairytale. When the sun fades away, I will shine for you. And you can see the pink roses with your chocolate eyes." - Dream Big Action: Volume 1


Tips:
The final result depends on your starting image. Try any tip below for better result
- Try duplicating your image and set it to screen for brighter picture
- Try duplicating your image and set it to Soft Light for more contrast
- Try adjusting the opacity of any layer: Color fill layer or adjustment layer

READ MORE...

PS Action: Enhancing Your Portrait Coloring

This morning, I feel like I have to post something here. So, I've created a simple action in Photoshop. Download and run this action in Photoshop to get a nice and bright effect on your portrait image, or whatever image you feel like using. Tips: You can adjust the opacity of each layer to get the best look for your image. There's a Color Balance adjustment layer included in this photo effect. You're welcomed to adjust the settings to get the right coloring for your image. In my sample image, I decided to enhance the red and yellow. Well, download this action, and your facebook profile picture doesn't have to be dull anymore =)

Download Action: Bright Photo Effect

How To Use: Guidelines To Use Our Photo Effect Action


More sample images:

Download Action: Supermodel Glowing Look

It's the glow (and some other things perhaps) that separate many of us from becoming the America's Next Top Model. Now, isn't it a good news that you have discovered a way to close that gap in Photoshop? Download this Supermodel glowing look action and your portrait will be glowing like there's no tomorrow. Now, all you have to do is learn how to pose like a model, and Top Model gurus said, the secret is not to act like one..now that's confusing. You can try this glowing effect on a landscape photo too and it'll gives a fairytale and mythic look to your photo.

Download Action: Supermodel Glowing Look

How To Use: Guidelines To Use Our Photo Effect Action

Photo CrossProcessing with Curves

You probably have seen a couple of posts in this blog related to Cross-processed photo. I just love the different coloring styles you can get from your digital photo just by tweaking the Curves in Photoshop. It's an excellent method to imitate the cross-processing effect in film photography. So, today I tried playing around with Photoshop and discovered these 3 neat coloring styles. You can download the Action set and maybe do a little Curve tweaking yourself. Tip: To control the intensity of each curve effect on your image, try lowering or increasing the opacity of the Curve adjustment layer.

Download Action: Photo Coloring with Curves

How To Use: Guidelines To Use Our Photo Effect Action


Cross-Process Effect 1 Sample Images


Cross-Process Effect 2 Sample Images


Cross-Process Effect 3 Sample Images

Download Action: Dragan Effect

The Dragan Effect is made popular by its pioneer, Andrzej Dragan, a Polish photographer (hence the name 'Dragan'). This photo effect enables you to see every last bit of texture in your portrait. It emphasizes each line, freckle, wrinkle and pore captured by the camera, giving your photo kind of dark and grungy look. It's like you're standing face to face with the subject. With the right portrait, you can imitate this effect beautifully in Photoshop. Download our Dragan Effect Photoshop action and start your portrait project now. Tip: For more intense effect, merge all the layers after you run the action. Then, try the Unsharp Mask to sharpen the image even more.

Download Action: Dragan Effect Action

How To Use: Guidelines To Use Our Photo Effect Action


Dragan Effect - Before and After Image

ActionSection: Download Photoshop Actions

Welcome to our ActionSection, a quick navigation page featuring our collection of free Photoshop actions (.atn files. We've created this page to make it easier for you to browse through all the free actions available in this blog. If you're crazy in love with Photoshop action, then this page should be in your bookmark list. This page will be updated as we post more free actions for you. So, why not sit back and relax, and let the Actions do all the work for you.


READ MORE...

Download Action : Pencil Sketch Effect

It may not be a perfect sketch but it's quite awesome (as awesome as watching Portugal scoring 7 goals in one game). Featured action for today is the pencil sketch effect action for Photoshop. This action set contains 5 actions. Each can create the sketch effect as shown in the preview images. Create your own black and white pencil sketch, or try our colored-pencil sketch featuring matrix-green, blue, sepia and red color. Tip 1: If you want a smooth sketch, start with a large image, run the action, and then resize the image to be smaller. Tip 2: You can also set layer 'Background copy 3' to invisible if that looks nicer on your picture.

Download Action: Pencil Sketch Effect Action Set

How To Use: Guidelines To Use Our Photo Effect Action


Pencil Sketch Effect (Before and After Image)


Color Pencil Sketch

Cross Processing with Curves Action Set

One way to enhance the coloring of your digital photo is using the Curve adjustment layer in Photoshop. It's a powerful tool that enable you to get different styles and coloring from a single photo. Don't worry if you're not that familiar with Curve. Download this action and run it in Photoshop to get the coloring shown in our preview below. Some tips for you: If your image is dark, duplicate that image and set the layer to Screen, adjust the opacity to your liking. You can also adjust the opacity of the curve layer after you're done running the action. This will adjust the intensity of the coloring effect.

Download Action: Cross Processing Curves Action Set

How To Use: Guidelines To Use Our Photo Effect Action


Curve 1 Action - Reddish Hue Cross Processing


Curve 2 Action - Yellowish Hue Cross Processing

Yellowish Retro Coloring Action

What do you guys think of the World Cup so far? Enough action to keep your blood pumping? Well, let's add something to that action, albeit it's a different kind of action. Here's another free image coloring action for your download. It will give that yellowish, kind of retro and old photo effect to your image. Again, most of the actions we offer here are created using adjustment layers whenever possible. So, it'll make it easier for you to adjust the settings afterward to whatever looks good for your photo.

Download Action: Yellowish Retro Coloring Action

How To Use: Guidelines To Use Our Photo Effect Action


Yellowish Retro Coloring Effect Photoshop Action

Download Adjustable Text Effect Action Set

Weekend is coming and it's time for a new action. This action set contains 12 effects for your text. And what so special about it, is that all 12 effects are totally adjustable after you are done running the action. The effects are created using the available Layer Style options in Photoshop. So, you can always manually change your font, size of the text, even the color if you want, after the final result. Preview of all 12 actions are included below. And after the preview, you can view a user guide for the action as well. Enjoy and have fun!

Download Action: Text Effect Action Set

A/N: Sometimes people ask what font I used for my text. So, for this post, I've provided the links to download all the fonts used in the preview. You can click on the preview image to download the font. Last time I checked, all of the fonts are still free.


Ice Effect Text .. Golden Text


Jelly Text Effect .. Glass Text Effect
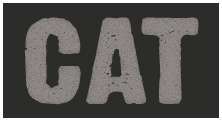
Cracked Stone Text with Dirty Headline Font
Metallic Text Effect .. Cracked Stone Text

Chrome Text with Deutsch Gothic Font Bling Text with Deftone Stylus Font
Chrome Text .. Bling Text

Billboard Text with NiteClub Font
Neon Text Effect .. Bee Movie Text

Alien Text with Mumsies Font Shine Metal Text with Varsity Regular Font
Alien Movie Text Effect .. Shining Metal Text

GUIDELINE ON USING THE ACTION

1. Open a new document in Photoshop. Select and run the action.
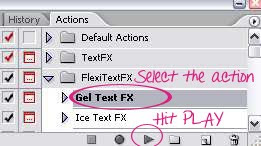


2. A small window as shown below will appear. Like the instruction says, click the 'Stop' button. Choose your Type Tool by hitting T on your keyboard. Then, type in your word. Don't worry about the font, color or size of your text. And the world will not end if you misspelled the word. You can change and correct them later if necessary.
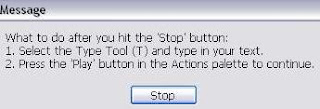


3. To continue, hit the Play button again on your action palette. And you're done. Below is the result.



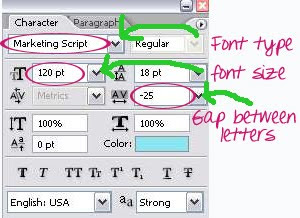
4. Now, if you think you need to do some adjustment on the font or the size of your text, click on the icon shown below to bring out your Text palette.



In the Text palette, you can change the font, size of your text and also the gap between the letters.


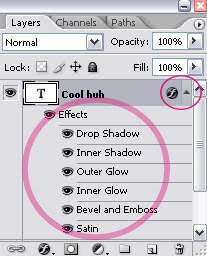
5. Further adjustment can be done if you decide to create something different with the effect. Take a look at your Layer Palette. Click on the drop-down arrow to see the Layer Effects applied to the text. You can explore them and create something new.


This action set includes:
Gel Text Effect, Ice Snow Text Effect, Bee Movie Text Effect, Metallic Text Effect, Chrome Text Effect, Cracked Stone Text, Glass Text, Alien Text, Billboard Text, Bling Text and Gold Text.
READ MORE...


Download Cross Processing Action Set

Cross processing in film photography is defined as processing film in a chemical solution meant for another type of film. This yield an interesting shift in color, and sometimes give a retro look to a picture. This effect can also be done in digital photography by manipulating the curves in Photoshop. Download this fun action set to spice up your photo instantly. Tips: For a dark photo, duplicate the image and set the duplicate layer to screen, reduce the opacity if necessary, then run the action. You can also set the duplicate layer to Soft Light or Overlay to achieve a slightly different effect.

Download Action: Cross-processing Action Set

How To Use: Guidelines To Use Our Photo Effect Action


Cross-Processing Action for Photoshop

Download Retro Old Photo Effect Action

One more photo effect action for your download. This action will give a yellowish retro-style look on your photograph. This retro effect is achieved using adjustment layers in Photoshop to allow some flexibility on your side. After you've run the action, you can change the settings of the adjustment layers according to your image. If you start with a slightly dark image, duplicate the image and set the layer to screen to increase the exposure. Some sample images included below.

Download Action: Retro Old Photo Effect

How To Use: Guidelines To Use Our Photo Effect Action


Old Retro Photo Effect Action

Download Canvas Painting Effect Action

This canvas painting effect works well for portrait and various other images too. If you want to read the tutorial and follow the steps one by one, that might take plenty of your time to achieve this photo effect. Why not download the action file instead. It's fast and easy. My tip is to start with a large image, then resize your image to be smaller to get a smoother sketch. Below are some examples of this canvas painting effect and link to download the action.

Download Action: Canvas Painting Action
How To Use: Guidelines To Use Our Photo Effect Action


Canvas Painting Action


Download Action: Canvas Painting Effect

Create Dark and Gloomy Photo Effect

Feeling blue right now? Let's create something to reflect that mood. This photoshop action is especially made to achieve the dark and gloomy look on your image. All you have to do is download and save the action to your hard disk. Load it in Photoshop. Open your image and run the action. Less than three seconds you'll get something like the sample image shown below. Before and after the blue and gloomy effect. This effect is created using adjustment layers. So, you're free to adjust the settings to achieve what's best for your starting photo. Tips: You can try setting the blending mode of the 2nd image layer to what looks good for your image. For instance, in the example below, the 2nd layer set to Color Burn with 95% opacity. You can try with Screen or Overlay blending modes as well.

Download Action: Dark Gloomy Effect

How To Use: Guidelines To Use Our Photo Effect Action


Dark Gloomy Coloring Effect in Photoshop

Turn Photo to Comic or Cartoon Effect Action

In the spirit of spreading happiness around the world, I'm sharing this comic effect action for FREE. This action is created in PS CS2 and it turns a boring photo into a smooth comic book effect with radiant coloring. If PS is smart enough, the action should work on any latest version of Photoshop, and oldest version if they have mercy. It may not be perfect but I got to say it's a pretty awesome action. How to use the action? Below are some guides for you to make sure the action works without any problem. Because we all know that actions are a bunch of commands that execute themselves eagerly without thinking..so it's up to you to do the thinking and make sure it gets the correct starting condition.

Download: Comic Coloring Effect Action


Before and After Image

Read more for guidelines on how to use the action.


Tips: Always start with a large image and resize it if necessary after you run the action.

Open your image in Photoshop and make sure your layer palette looks like the picture below ie. (a)only one layer, (b)it should be named 'Background' and (c)it should be locked with a sophisticated lock symbol on the side. Click on the 'Background' layer on the layer palette to select that layer and run the action.


If for some reason, above is not the case for you, here's what you can do to achieve the correct starting point for the action:

READ MORE...

Old Vintage Photo Effect Action

I found this action while browsing the internet for something cool and fabulous. And now, I'm addicted to this action. What this action does essentially is give your photo that old vintage look with an interesting coloring and lomo effect. And what I'm doing now is sharing with you my addiction. This old vintage action works well with any photo, even those you took with your digital camera.

You can download the old vintage action HERE.
You can learn how to use action file in general HERE.
You can turn back time and make everything alright..Mmm, sorry I don't have a link for that, you just gonna have to deal with it.

Before..


After..


And read more for some teasers I made to tease you into this addiction =)
All photos below were cross-processed using the Old Vintage Action.


READ MORE...

30 Color Enhancement Photoshop Actions

Great resource for those who love making fanart and icons just for fun. Enhance the tone and color of your images using this Photoshop coloring action set. This auto-coloring adjustment action set does a great job in boosting the color of your image, enhancing a certain color like red or blue and making your image more interesting to the viewers. These actions are created in Photoshop CS2 and most of them involve selective coloring and color filters and a few other adjustment layers. This set includes 30 actions, each of them will give different coloring to your image.

Download all actions in one set: Coloring Action Set
*Or click on the image to download individual action.

Instruction: How to load and use this coloring action set


READ MORE...

Photoshop Action: Glowing Neon Text Effect

Download the action file for this shining neon text effect. Cool, right?


Download -- Photoshop Action: Neon Text Effect

Read more for a short tutorial on how to use this action.


How to use this Action

1. Load the Action file into your Photoshop. If you don't know how to do this, here's an instruction on how to load action file in Photoshop.

2. Open a new document. Set the background color to black or any other dark color.

3. Choose the Type Tool (T) and type in your text. Set the text color to white (#ffffff)

4. With the text layer selected in the layer palette, play the action.


I've tested this action several times in my computer and it worked fine. If any of you is having a problem with it, please let me know. This action is done in Photoshop CS2, so I'm not sure how compatible it is with other version of Photoshop. But I think it will work just fine =)

READ MORE...